Quotations
The Quotations works like a Oneclick system, where by accepting the contract, the environment is automatically provisioned with just one click. This approach simplifies the deployment process, eliminating manual steps and making it up to 100% faster, depending on your infrastructure.
1. Advantages of the Quotations
- Speed: Significantly reduces environment provisioning time, allowing your system to be ready in minutes.
- Ease: The deployment process becomes simple and accessible, with no need for advanced technical knowledge.
- Efficiency: Automates repetitive tasks and eliminates the possibility of manual errors, ensuring the environment is properly configured.
With the Quotations (Oneclick), the deployment experience becomes much more efficient, helping reduce setup time and increase your team's productivity.
When a user is linked to a company with the CLIENT profile, they do not have access to the Quotations screen.
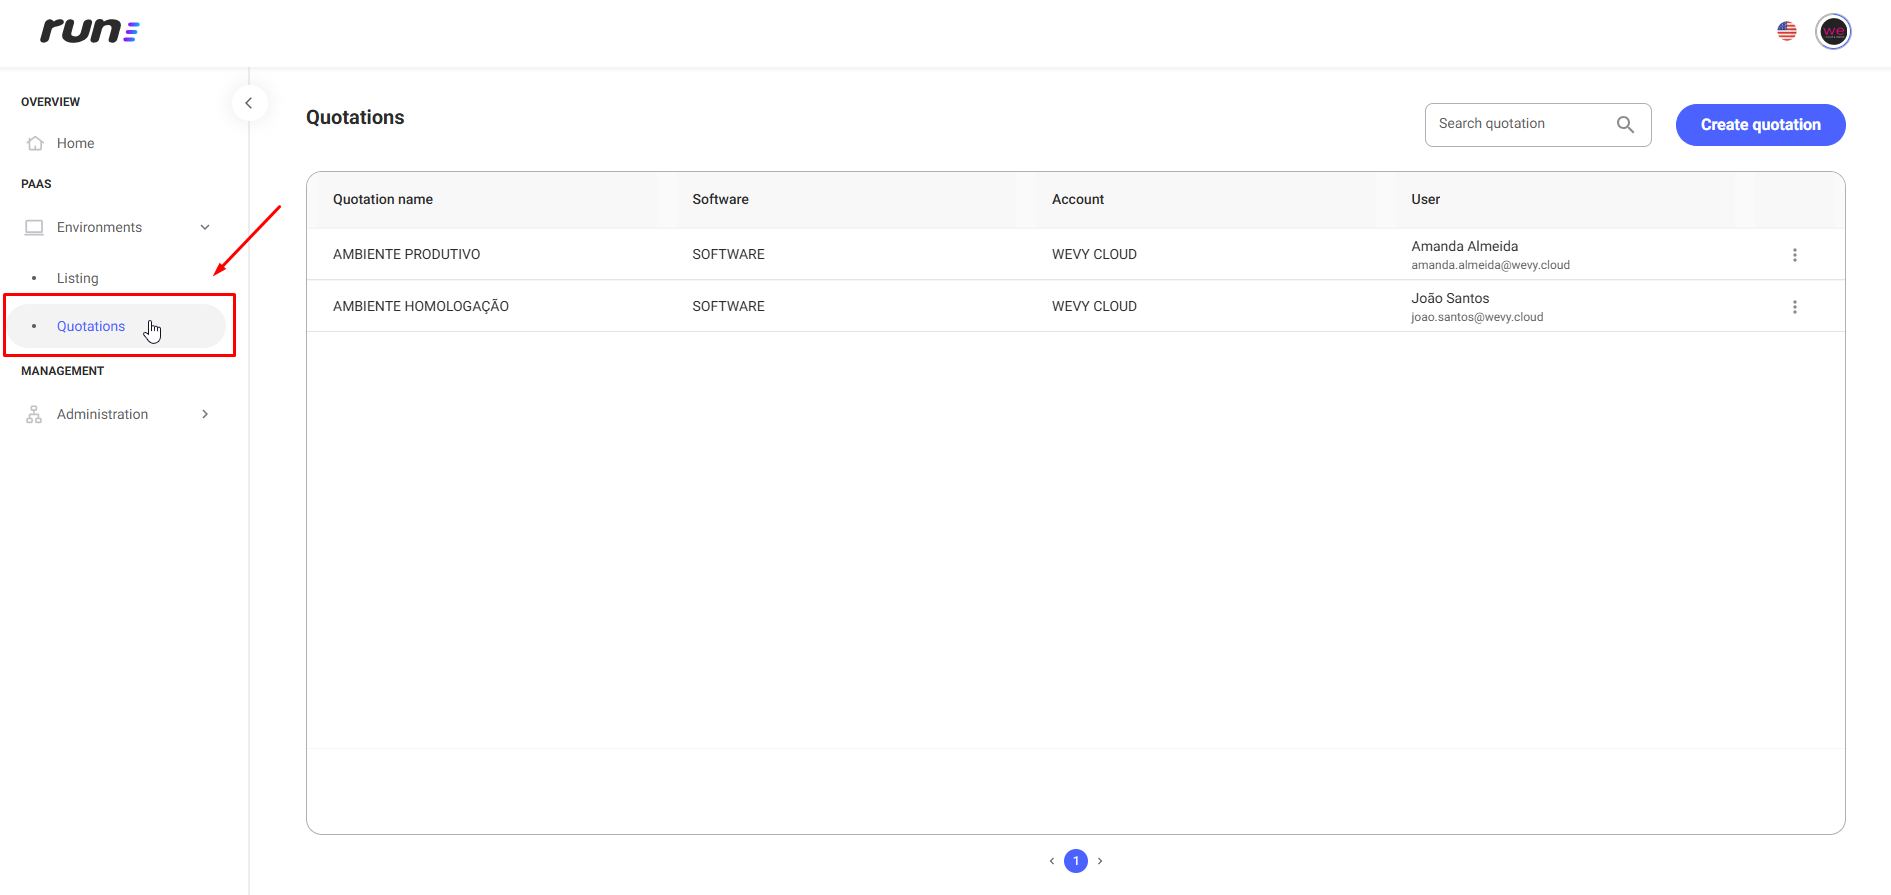
2. Search Bar
- Located in the upper-right corner, the search bar allows users to look for specific quotationss by Quotations Name or part of the quotations name.
- The search field displays the example text "Search for Quotations", guiding users on how to perform the search.

3. Quotations Table
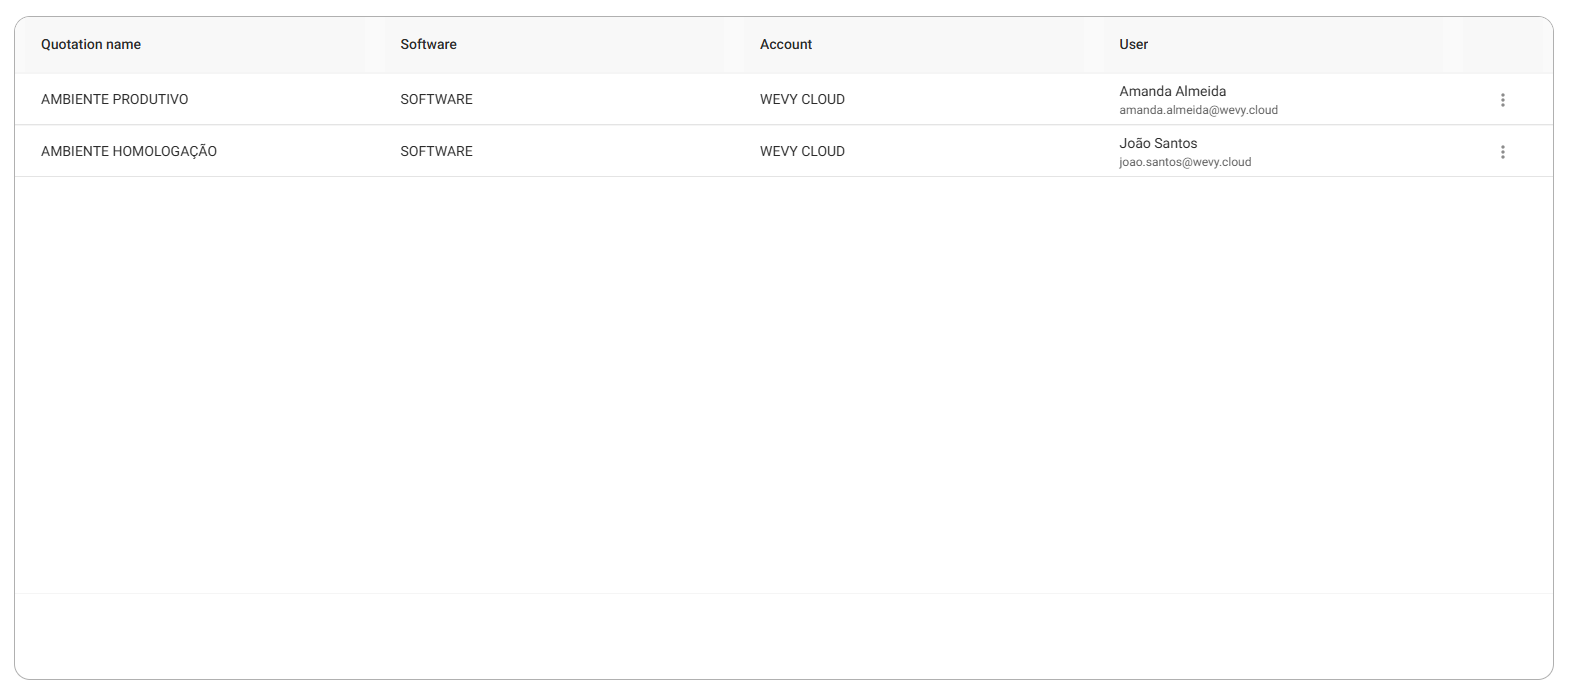
The table contains the following columns:
| Column | Description |
|---|---|
| Quotations Name | Corresponds to the Environment Name filled in during the quotations creation. |
| Software | System or tool associated with the quotations. |
| Account | Client name linked to the quotations. |
| User | Name and email of the person responsible for the quotations. |
4. Available Actions in Quotations
The Actions menu (three dots) next to each quotations provides additional options. Clicking it reveals the following options:
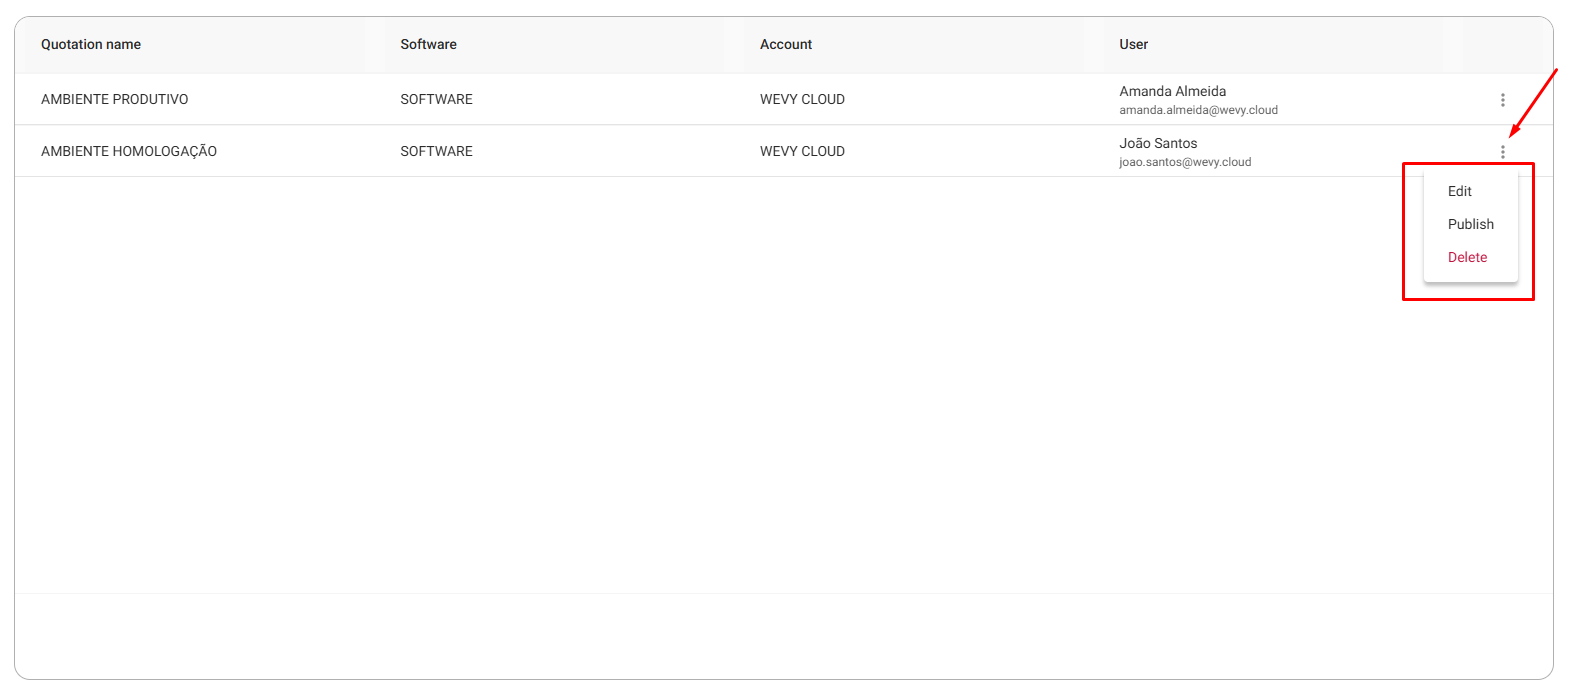
Available Actions
| Action | Description |
|---|---|
| Edit | Allows editing the quotations data. |
| Publish | Starts the process of hiring the selected quotations. |
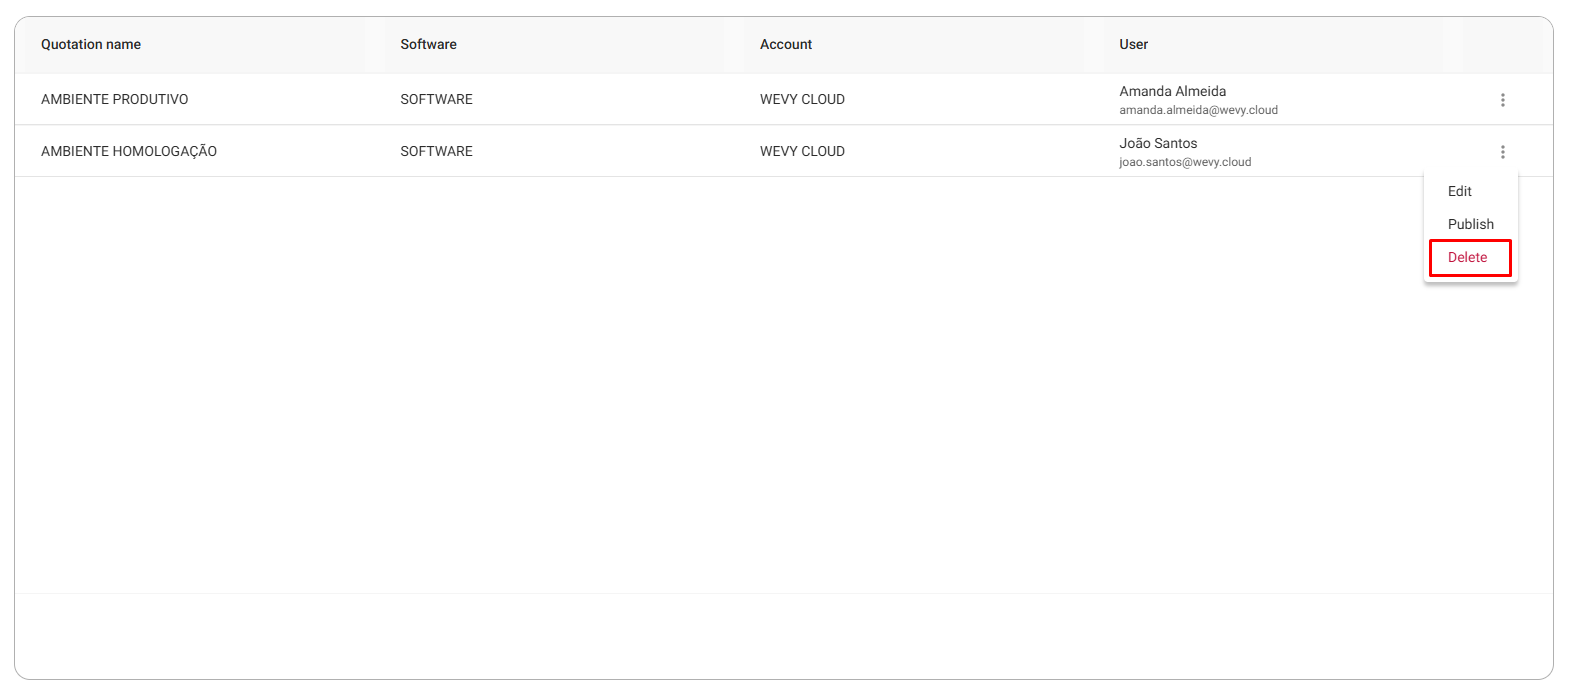
| Delete | Removes the quotations from the list. This action is irreversible. |
4.1. Edit
Clicking Edit opens the quotations editing screen, allowing modification of all previously registered parameters.
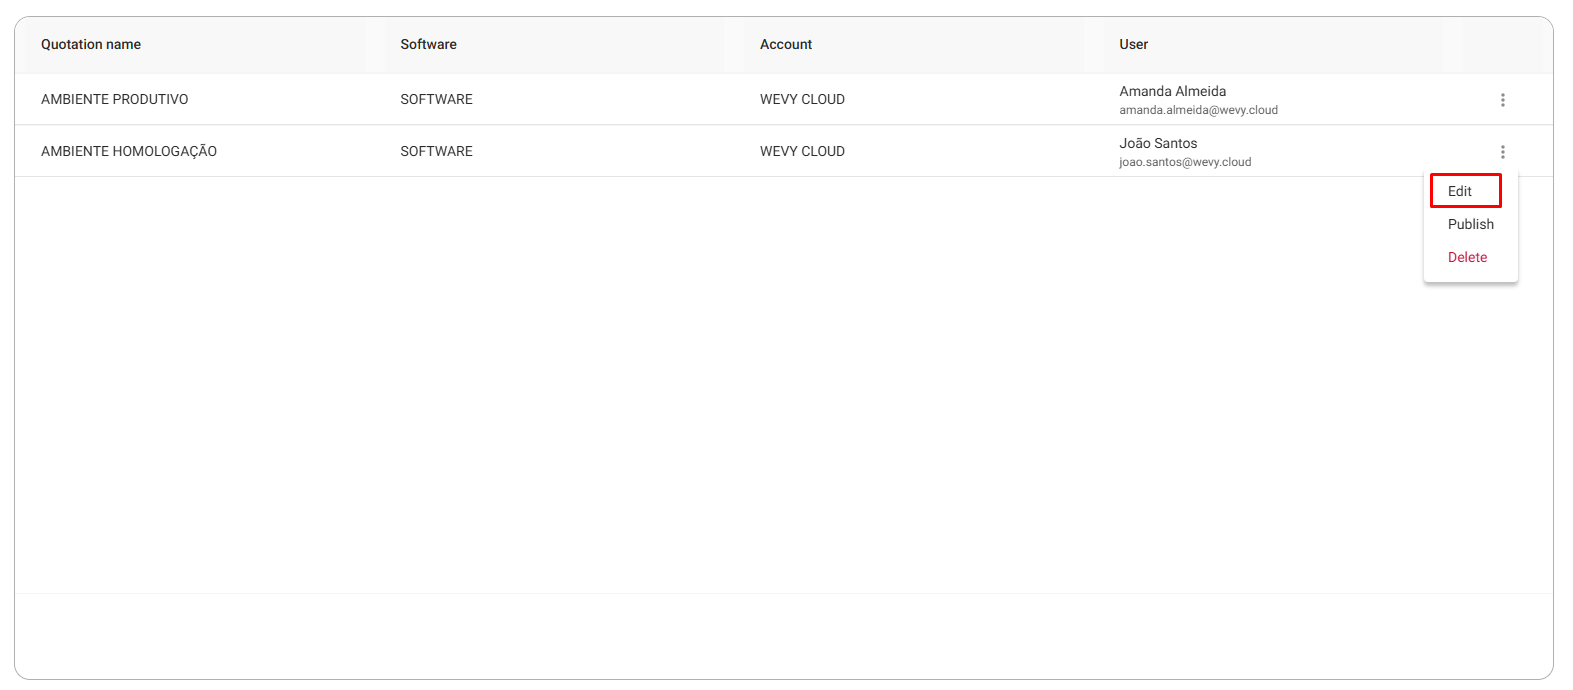
Editing is divided into sequential steps, starting with Main Parameters. Users can navigate using the buttons:
- Next: proceeds to the next editing step.
- Back: returns to the previous step, if needed.
In the final step, called Acceptance Terms, the user has two options:
- Save Quotations: saves the edits, keeping the quotations available for future adjustments.
- Accept: confirms the edits and immediately deploys the quotations.
4.2. Publish
Clicking Publish starts the environment contracting process.
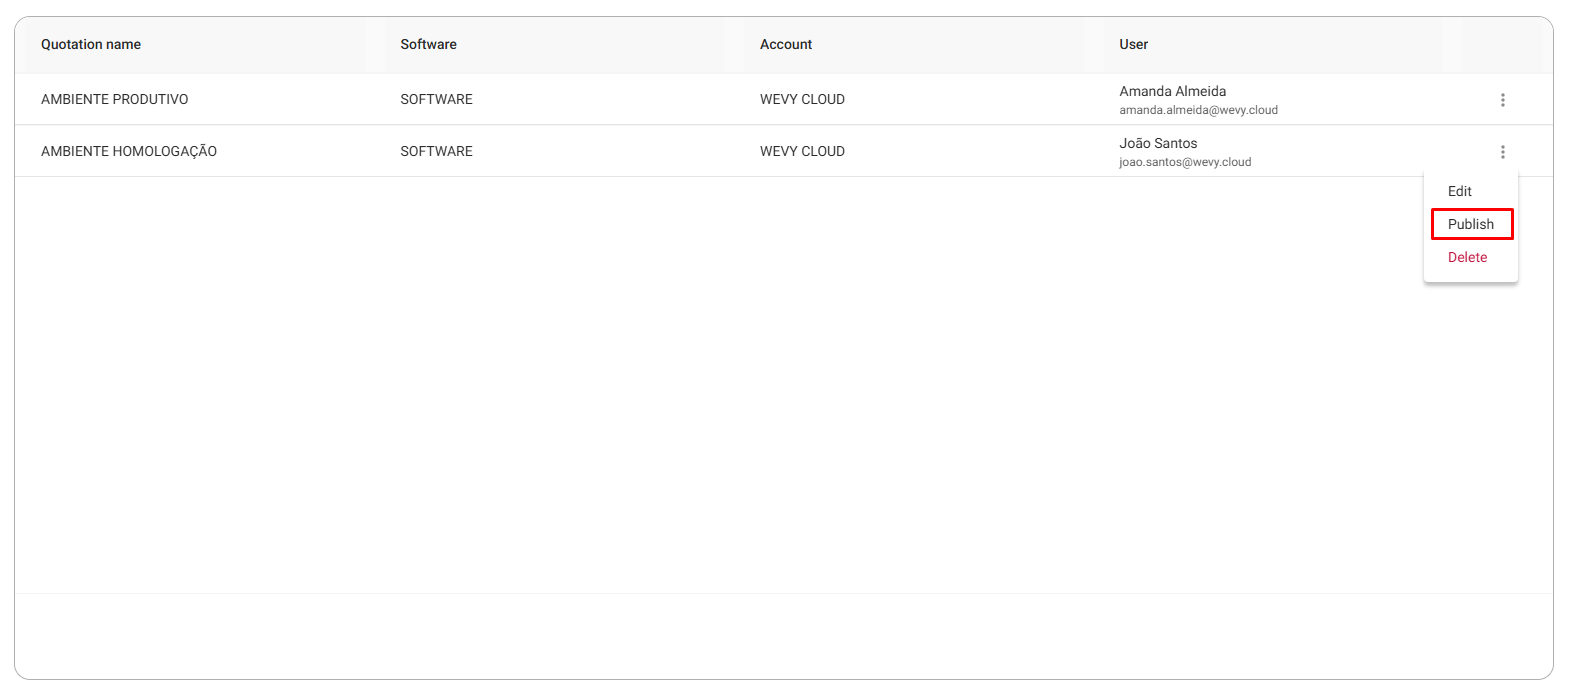
- This opens the quotations editing screen directly on the Acceptance Terms section.
- The user should review the data and follow the steps presented to finalize the acceptance.
- Clicking Accept triggers the system to automatically configure and publish the environment, functioning as a Oneclick deployment process — no additional manual steps needed.
4.3. Delete
This action is irreversible.
Steps to Delete
🔵 Step 1. Click the Delete button
🔵 Step 2. The quotations deletion confirmation screen will open.
- Click Confirm to confirm.
- Click Cancel to abort the action.
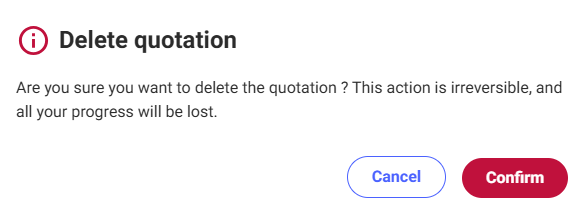
"Are you sure you want to delete the quotations? This action is irreversible and all progress will be lost."
After deletion, the quotations cannot be recovered and all related data will be lost.
5. Create Quotations
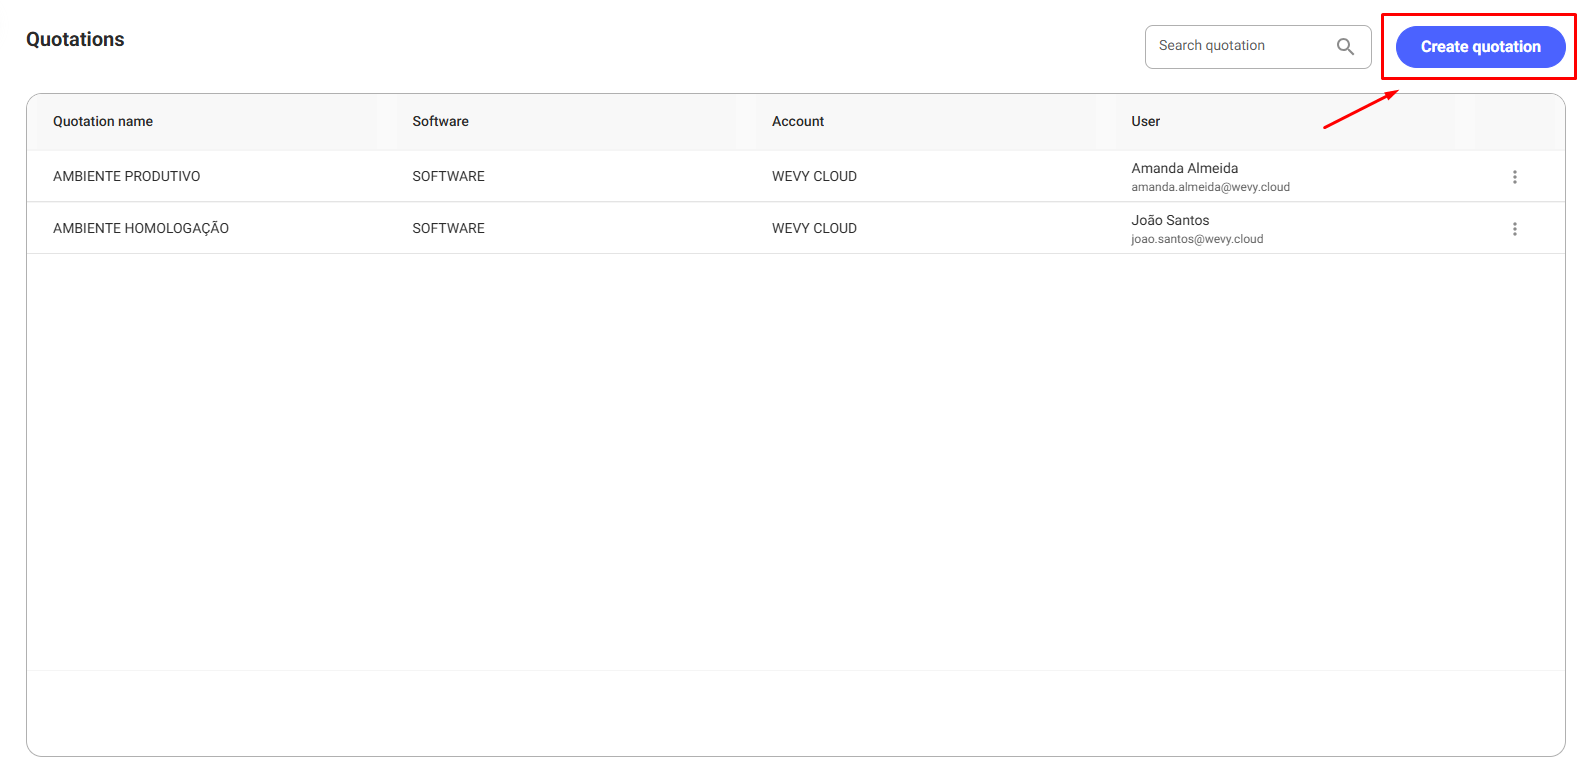
The Create Quotations feature allows starting the planning of a new environment. It enables partially saving information and editing it later before publication.
- Click the Create Quotations button (top-right corner) to begin creating a new environment quotations.
5.1. Select Software
After clicking Create Quotations, the software selection screen will appear.
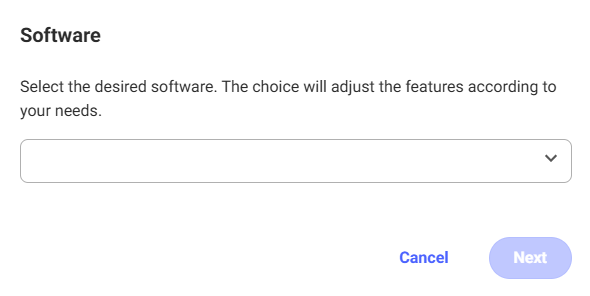
- Selecting the software at this step is essential, as it defines which environment categories will be available during quotations creation.
- Each system may have specific categories preconfigured, such as:
- Dedicated Environment
- Shared Cluster
- Shared Instance
These categories determine how the infrastructure will be provisioned for the end client, directly affecting isolation level, control, scalability, and license usage.
-
Check documentation:
To better understand each category, its characteristics, advantages, and use cases, click here ➡️ Environment Categories -
After selecting the software, the user can:
- Click Cancel to exit the process without saving.
- Click Next to continue editing the quotations.
5.2. Step-by-Step to Create an Environment Quotation
Each step of the quotation creation or editing process allows navigation with Next and Back buttons, facilitating review and adjustment of information before finalization.
🔵 Step 1. Main Parameters
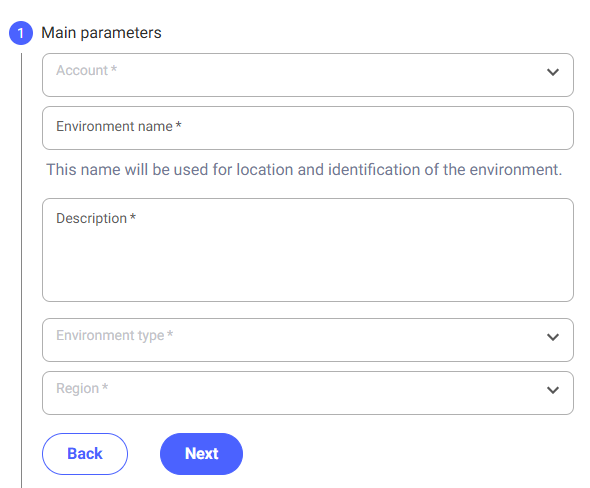
Fill in the basic environment information:
- Account: Allows selection of the desired Client.
A list containing the company associated with your user and its linked clients will be presented for selection. - Environment Name: Enter a name for the environment.
- Description: Enter a brief description of the environment.
- Environment Type: Select between Development, Staging, or Production.
- Region: Geographic location of the environment.
- If the selected software has reached the maximum number of allowed users, an alert will be displayed and you will not be able to proceed to the next steps.
- If this occurs, contact the sales team to request a capacity increase, if necessary.
🔵 Step 2. Number of Users

Define the number of users who will have access to the environment:
- Use the – and + buttons to adjust values within allowed limits.
- It is also possible to manually enter the desired value or select one of the predefined values 40, 80, or 120 shown on the screen to facilitate configuration.
- Minimum and Maximum validation: Limits are established to ensure values are within acceptable standards.
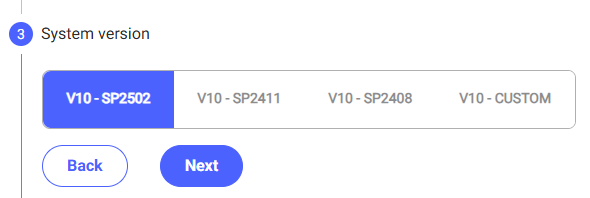
🔵 Step 3. System Version
When applicable, this step allows selecting the specific system version that will be used in the environment, according to the chosen software.
Select the system version:
🔵 Step 4. Database
Allows configuring the database specifications according to the client’s needs.
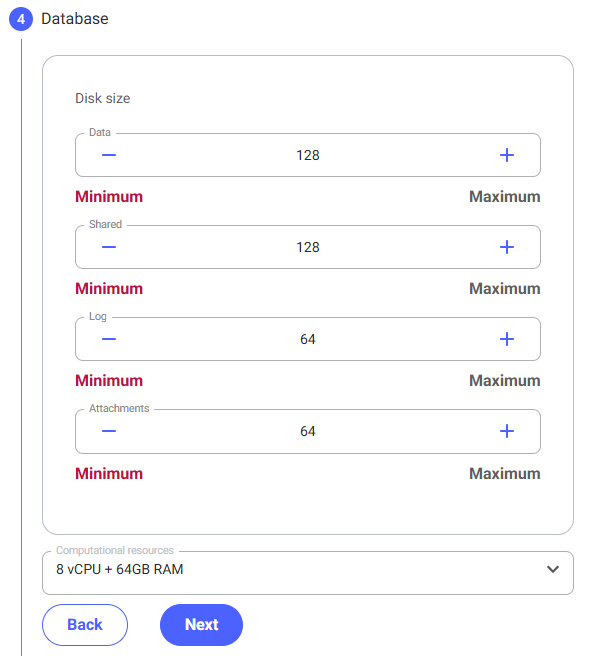
Configure the database parameters:
- You can adjust storage and performance parameters to meet system demand.
- Use the – and + buttons to adjust values within allowed limits.
- Minimum and Maximum validation: Limits are established to guarantee values are within acceptable ranges.
- Computational resources: Configure parameters as needed to meet system requirements.
🔵 Step 5. Additional Settings
Allows customizing the environment according to project needs, with the option to adjust resources, select operating systems, and define specific parameters to optimize performance.
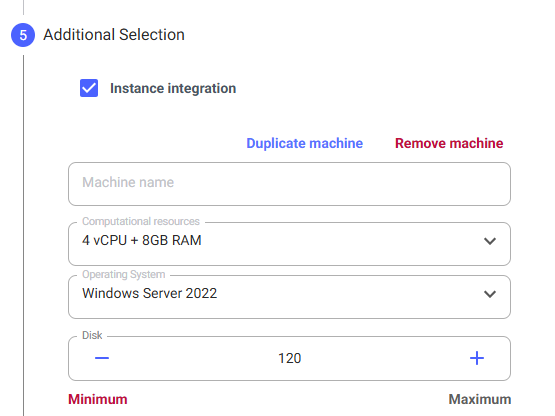
Customize the environment resources:
- Duplicate machine: Creates a new instance identical to the current machine, with the same resources and configurations.
- Remove machine: Visible only after duplicating a machine. If there is only one machine, to remove it, uncheck the selection box
 .
. - Machine name: Define a unique name for the virtual machine (VM), facilitating its identification in the environment.
Available settings per machine:
- Computational resources: Define processing power and memory capacity. For example:
4 vCPU + 8 GB RAM. - Operating System: Choose the desired operating system for the machine. Example:
Windows Server 2022. - Disk: Specify the amount of disk storage (in GB) to be allocated to the machine.
- Minimum and Maximum: Limits are defined to ensure values fall within the permitted range.
- It is possible to manually adjust the value, select predefined options, or use the – and + buttons to increase or decrease capacity.
🔵 Step 6. Acceptance Terms
Carefully review all entered information, read the terms and conditions, and accept only if you fully agree to finalize environment creation.
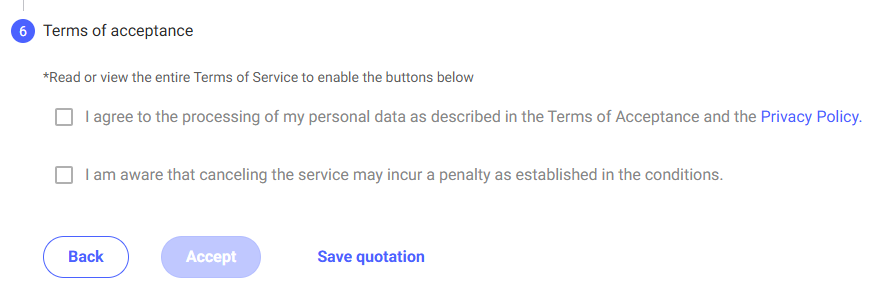
Save as Quotation
- If you wish to interrupt the process before acceptance, click Save Quotation.
- The quotation will store all information entered so far, allowing you to resume it later without losing data.
- If the user does not agree with the Acceptance Terms, click Save Quotation and contact support or the responsible team for clarifications.
Terms Validation and Acceptance
To enable the Accept button, follow these instructions:
- Read the Acceptance Terms in full.
- ⚠️ Scrolling to the bottom of the text is mandatory to enable the agreement options.
- The checkboxes for Agreement with Data Processing and Acknowledgment of Service Cancellation will only be enabled after scrolling the full content.
- Check both options after reading.
- Click Accept only if you fully agree with the presented terms and conditions.
After clicking the Accept button:
- The system records the acceptance and automatically initiates environment deployment using the Oneclick feature.
- The quotation is instantly converted into an active environment without requiring additional manual steps.
- The user is redirected to the Environment Listing Screen, where they can track the status of the created environment.
By clicking Accept, the user declares they have read, understood, and agreed to the terms without any form of coercion or obligation.