Overview
1. Home Screen
- Upon accessing the platform, you will find an intuitive interface that organizes the main features clearly and efficiently. The homepage is composed of the following sections:
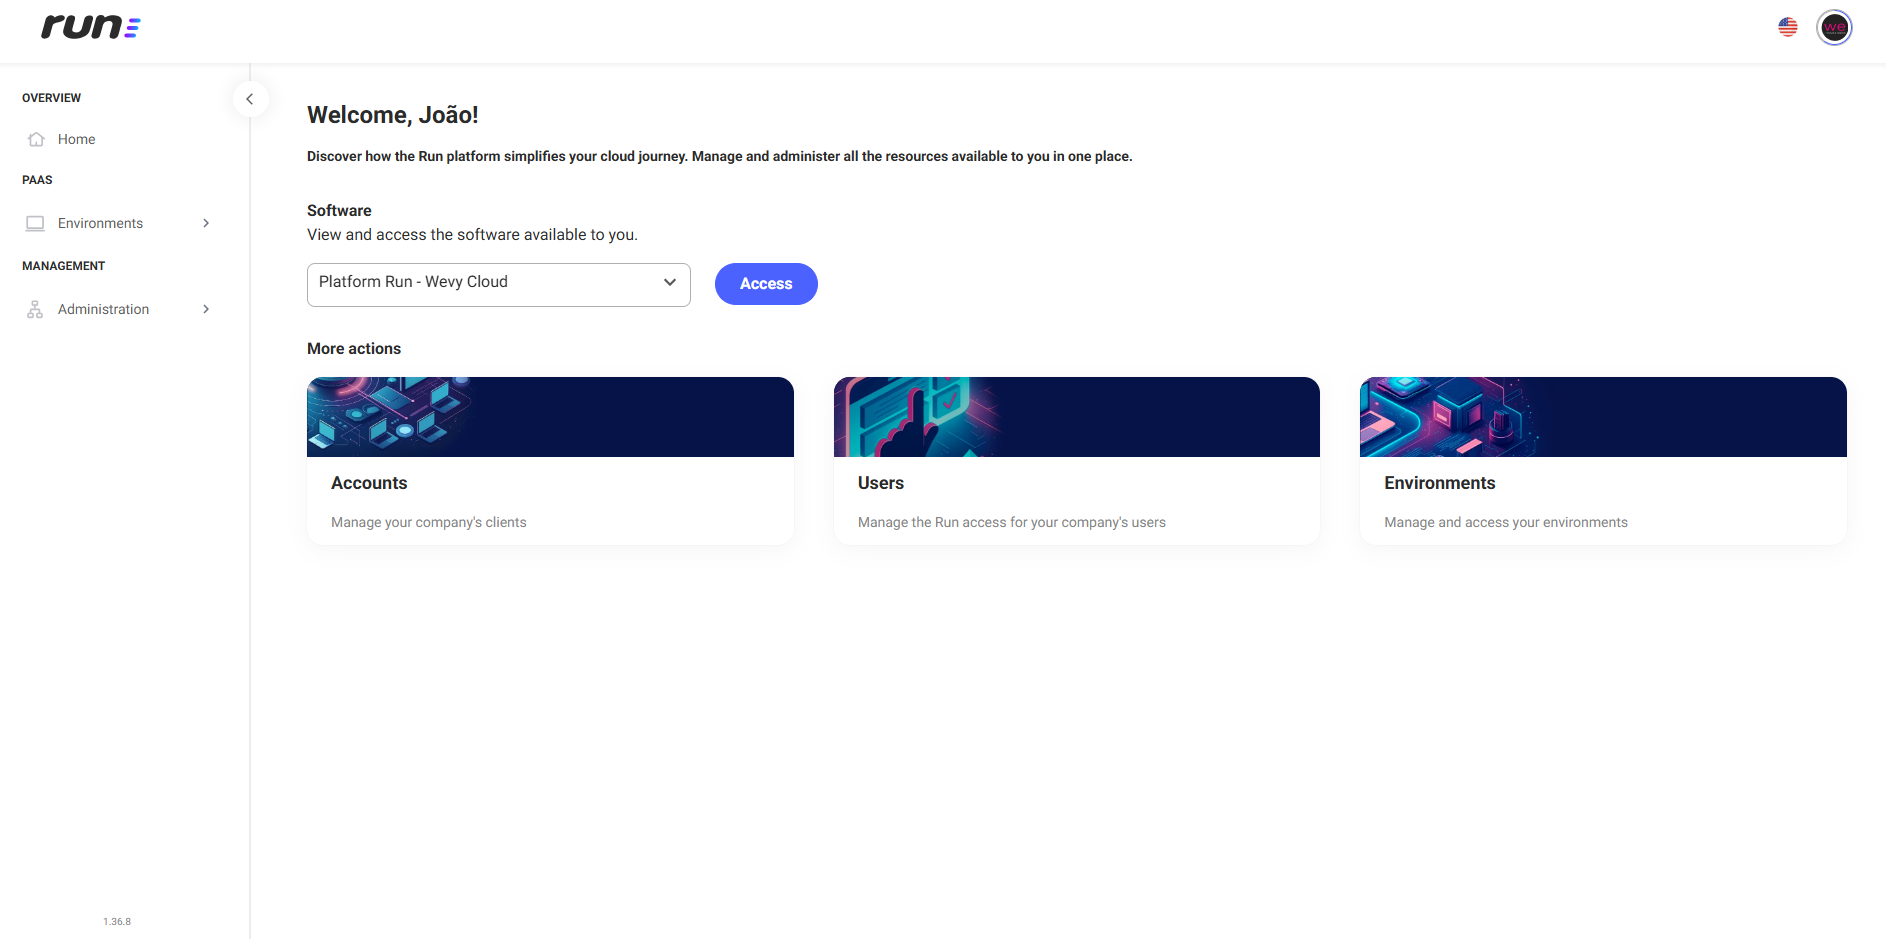
1.1. Welcome
- The welcome section displays a personalized message with the user's name: "Discover how we simplify your cloud journey through our features."

1.2. Build Something New
This section presents shortcuts to make your experience faster and more efficient. The available options are:
- Accounts: Manage your company's clients.
- Users: Manage your company's users.
- Environments: View the list of environments and manage related settings.

1.3. Software
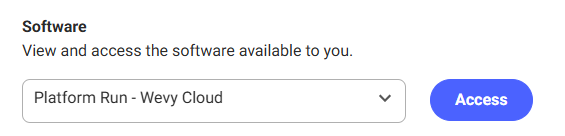
- A selection field allows you to choose between the active environments of the respective account.
1.3.1. Accessing
- When clicking Access, the system will check if the user has an assigned license to continue.
- If no license is available, assignment will be required before proceeding.
- If the user does not have a license, it will be necessary to assign a license.
- Check the documentation:
- For more details on how to Assign a License ➡️ Click here.
- It is important to remember that access to the system will occur only after the user has configured the environment through the image management (blue/green deployment) option.
- Check the documentation:
- For more information on Image Management ➡️ click here.
- When clicking Access, the user will be automatically redirected to a new browser tab where they can access the software without needing to input a username or password. These are managed by the platform, ensuring greater security for your environment and preventing credential leakage.
- For web environments that use more than one schema within the same application, the user will need to select which one to authenticate against.
- This section will only be displayed if there is an active environment in the respective account.
- When clicking the "Access" button, ensure the pop-up is not blocked. If it has been blocked, click the access button again or unblock the pop-up and then click again to release it.
1.3.2 Autoscaling
The Platform Run's autoscaling dynamically adjusts computational resources based on demand. It works by adding or removing instances as needed, ensuring optimized performance and cost efficiency. The process involves the following aspects:
-
Continuous Monitoring
Metrics such as CPU, memory, network usage, and response time are constantly monitored. -
Scaling Triggers
If resources reach a predefined threshold, new instances are added. If the load decreases, excess instances are removed. -
Types of Scalability
Horizontal Scalability: New instances are automatically created and made available. -
Load Balancing
Requests are distributed across available instances to avoid overloading a single machine. -
Scaling Policies
- Based on Metrics: Responds to resource usage indicators.
- Based on Schedules: Automatically adjusts resources at predefined times.
-
Redundancy and High Availability
Autoscaling ensures the system continues to operate even if a specific instance fails. This approach improves performance, reliability, and efficiency, ensuring that the system always has the resources needed to function properly.
2. Sidebar Menu
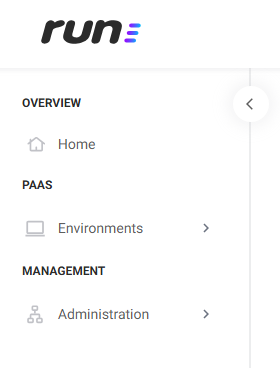
The system features a sidebar menu that can be expanded or collapsed, providing a more practical and adaptable navigation experience.
2.1 Expanded Menu
- Allows clearer navigation between sections.
- The collapse button
 at the top right of the menu closes the detailed view.
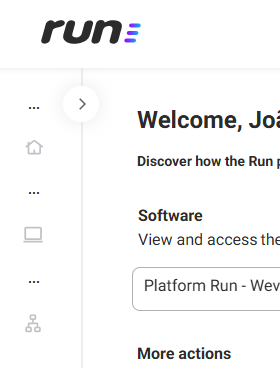
2.2 Collapsed Menu
- Displays only the icons of the sections, saving screen space.
- Icons remain functional.
- Click the button
 to expand the menu again.
2.3. Overview
- Home: The main page of the system.

2.4. Environments
In the environments section, the user can manage images, define entry rules, control privileged accesses, and perform other essential configurations, ensuring full autonomy in managing environments.
- Listing: List of all configured environments.
- Quotations: Option to view or edit quotations of environments that have not yet been published.

2.5. Management
Access to the system's administrative settings, allowing for client registration and consultation, as well as managing users linked to your company.
- Accounts: Management of registered accounts in the system.
- Users: Manage system users, define permissions, and access.

3. Change System Language
The system allows you to quickly and easily change the interface language.
3.1. Accessing the language selector
- In the top right corner of the screen, locate the current language flag icon.
- Click on the icon to open the available language menu.
3.2. Choosing the desired language
The menu displays the following options:
 Portuguese (BR)
 English (US)
 Español (ES)
- Click the desired language to automatically update the interface.
4. User Profile
- Click the icon next to the flag in the top right.
- The menu will open, displaying your information and available options.
- Keep your information up to date.
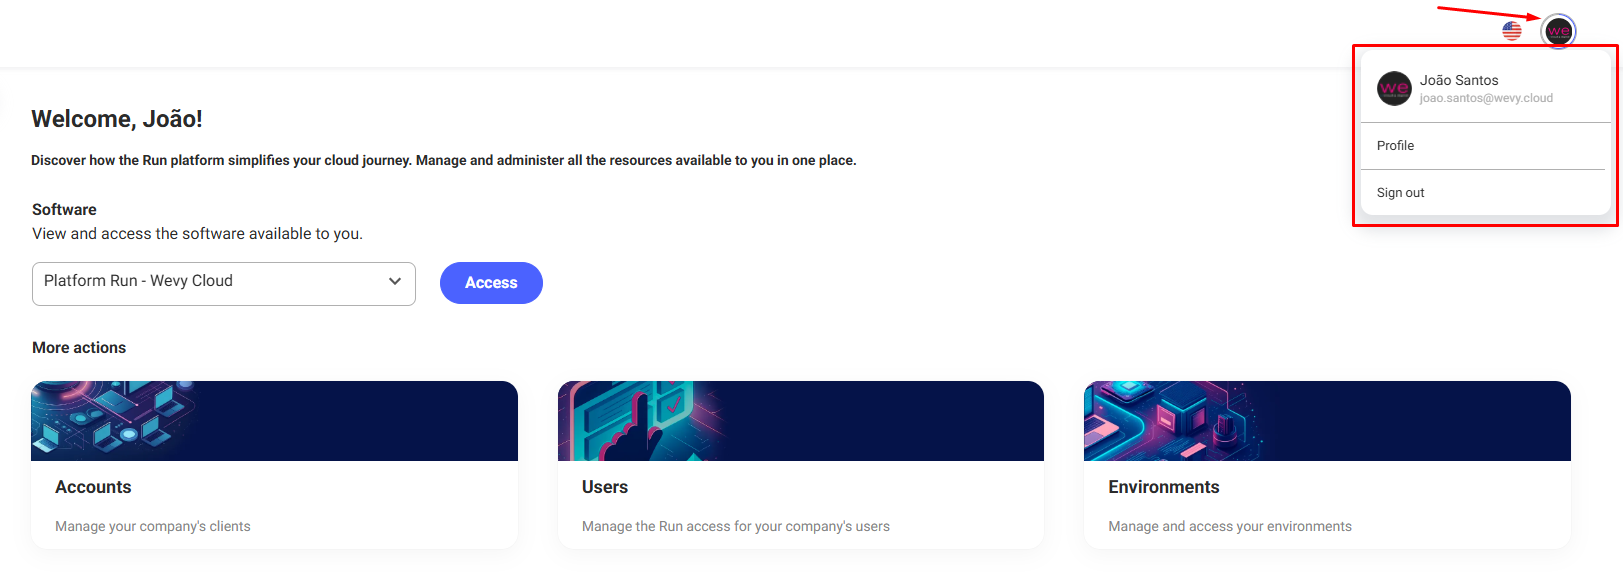
Displayed Information
- Name: Displays the registered first and last name.
- Email: Displays the user's email.
- Profile: View and edit personal information.
- Sign out: Click to end your session and return to the Unified login screen.
5. Profile Screen
The Profile screen displays your personal and contact information, as well as the status of multi-factor authentication (MFA).
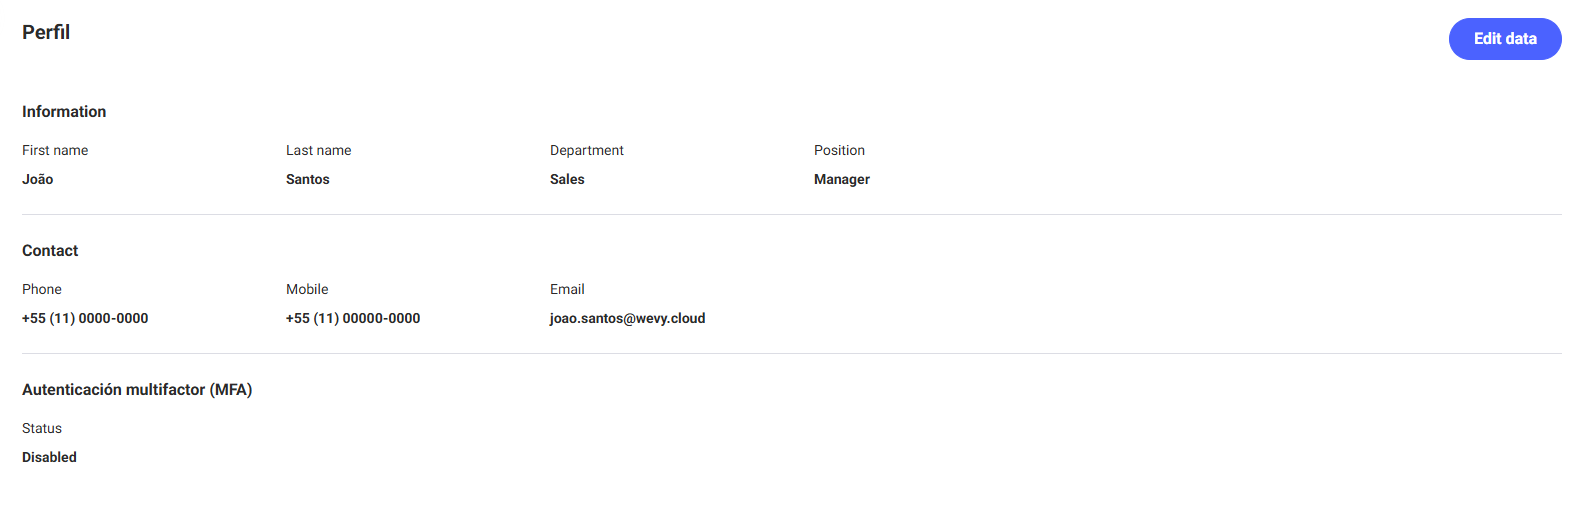
5.1. User Information
Displays basic user data registered in the system:
- First Name: The user's first name.
- Last Name: The user's last name or surname.
- Department: The department or area of expertise of the user within the organization.
- Position: The user's role or job title in the company.

5.2. Contact
Displays the user's communication information:
- Phone: The user's landline number, if provided.
- Mobile: The user's mobile phone number.
- Email: The user's primary email used for login.

5.3. Multi-Factor Authentication (MFA)
- View MFA status: Indicates whether multi-factor authentication (MFA) is enabled or disabled.
5.4. Access User Profile Edit
Click the Edit data button in the top right corner.

6. Edit User Profile
Upon accessing the profile edit screen, the user can modify their information.
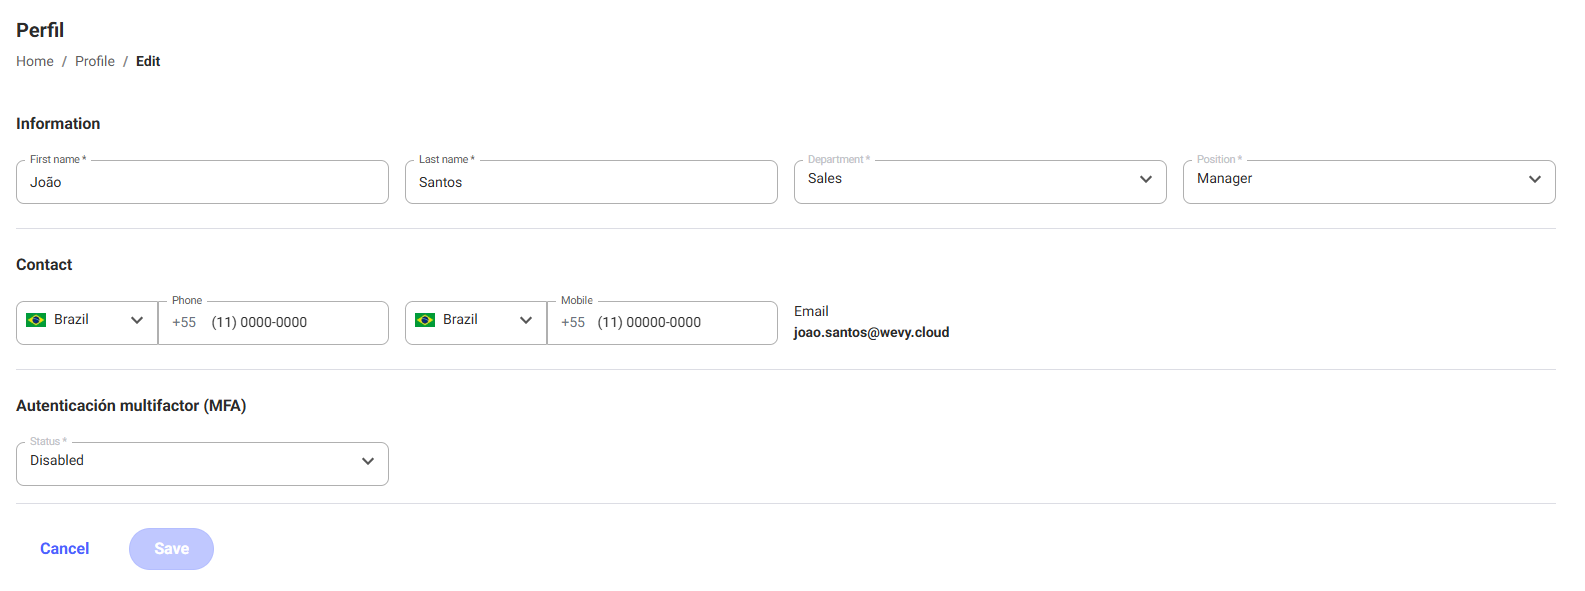
6.1. Personal Information
- First Name.
- Last Name.
- Department.
- Position.
6.2. Contact
- Phone.
- Mobile.
The email registered cannot be changed for security and identification purposes.
6.3. Multi-Factor Authentication (MFA)
MFA adds an extra layer of security by requiring a second form of authentication beyond the password.
- Status: Set whether MFA will be enabled or disabled for the user.
The user can only change the MFA status if the company linked to their profile has the MFA setting marked as optional. If MFA is mandatory in the linked company, the status will be fixed and cannot be modified by the user.
6.4. Actions
After making the desired changes, the action must be confirmed:
- The Cancel button allows you to abandon the edit and discard any changes made.
- The Save button confirms the changes and updates the user's profile.