Login
This section contains detailed instructions on the login process, password recovery, and Multi-Factor Authentication (MFA).
1. Initial Access with Temporary Password
When the user is registered on the Run platform, an invitation will be sent to the provided email containing a temporary password for the first login.
1.1. Receiving the Invitation Email
- You will receive an email with a temporary password and a link to access the Run platform. This email contains all the necessary information for your first login.
- To start your first access:
- Open the email and locate the Access Portal button. Click the button to be redirected to the Temporary Password screen.
- If the button doesn't work, click the link below or copy and paste the link from the email into your browser.
- Use the temporary password provided to continue the login process.
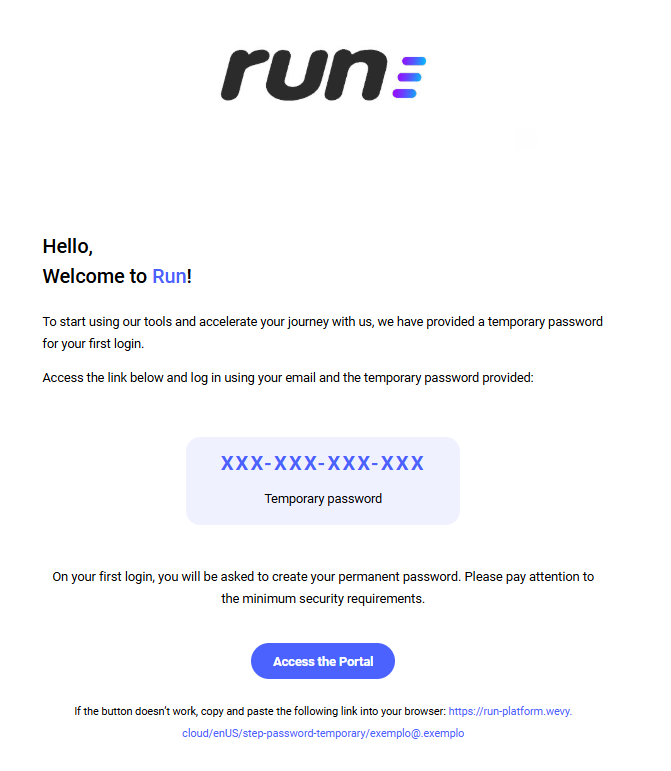
- When copying the temporary password, make sure there are no additional spaces when pasting it.
- If you don't receive the email, check the spam folder.
- The temporary password in the image is for illustration purposes only.
1.2 Entering the Temporary Password
- Check your email and locate the message containing your temporary password.
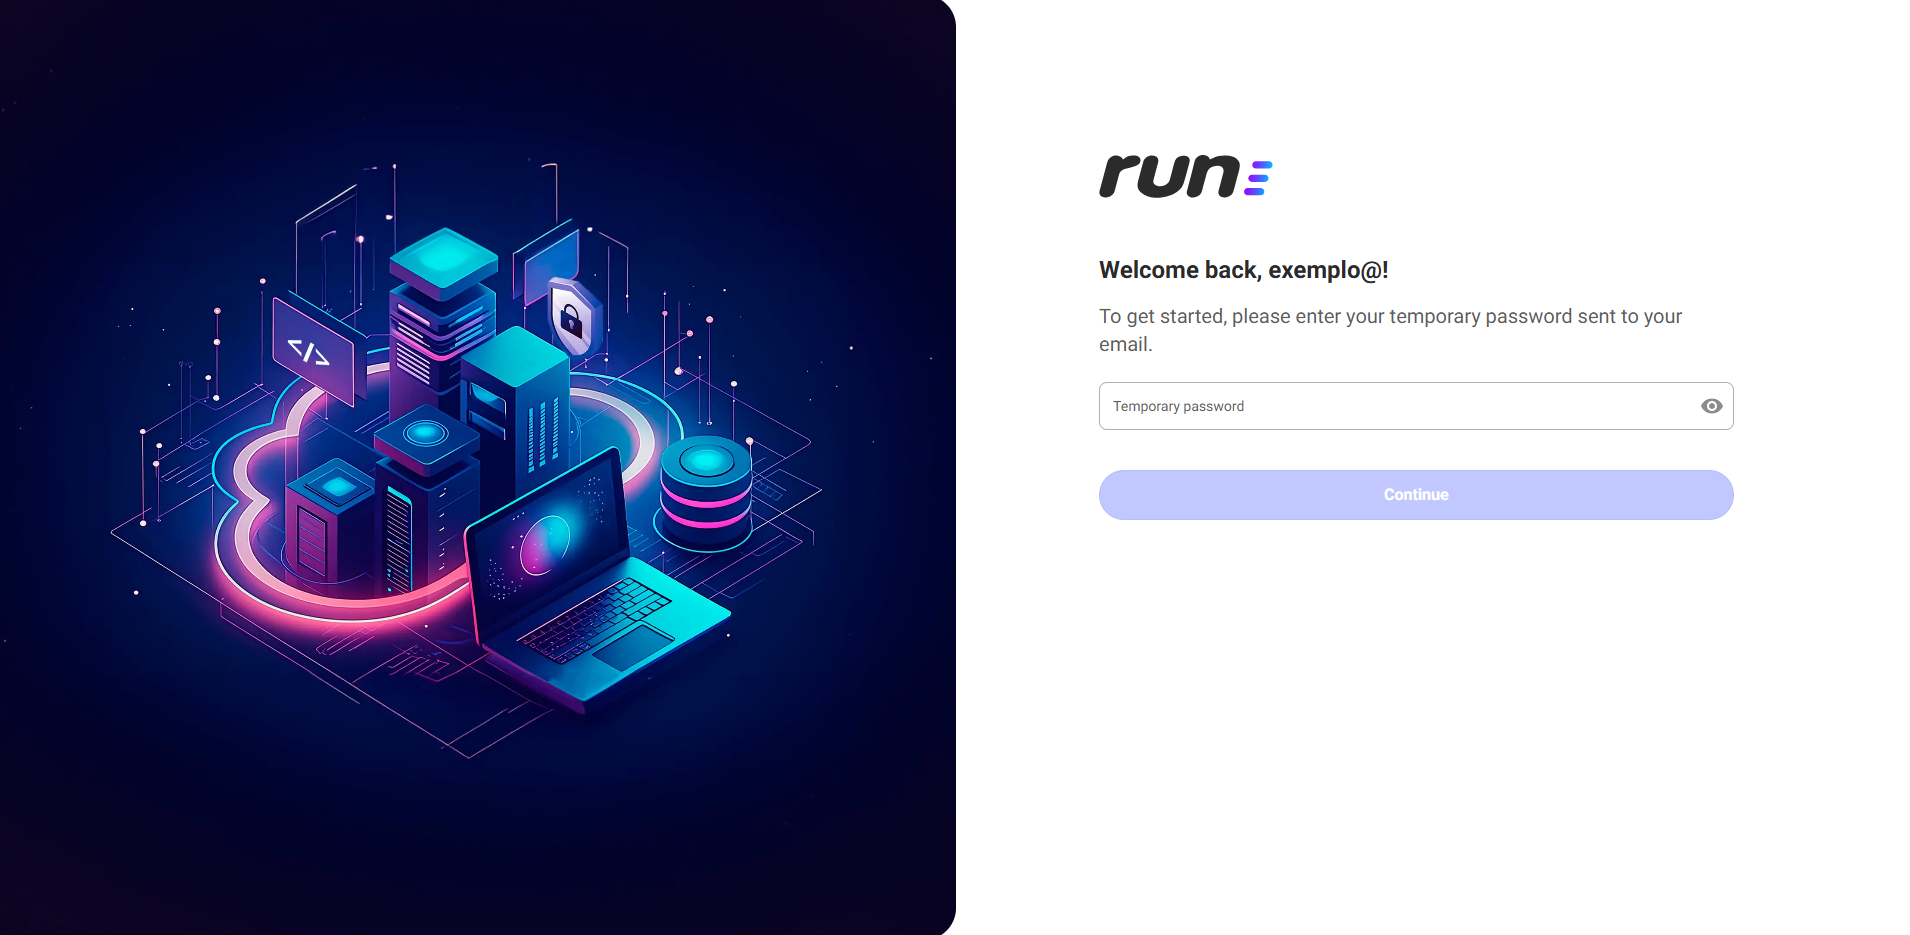
- On the temporary password screen, enter the temporary password in the indicated field.
- Click the Continue button to proceed.
1.3. Setting the Final Password
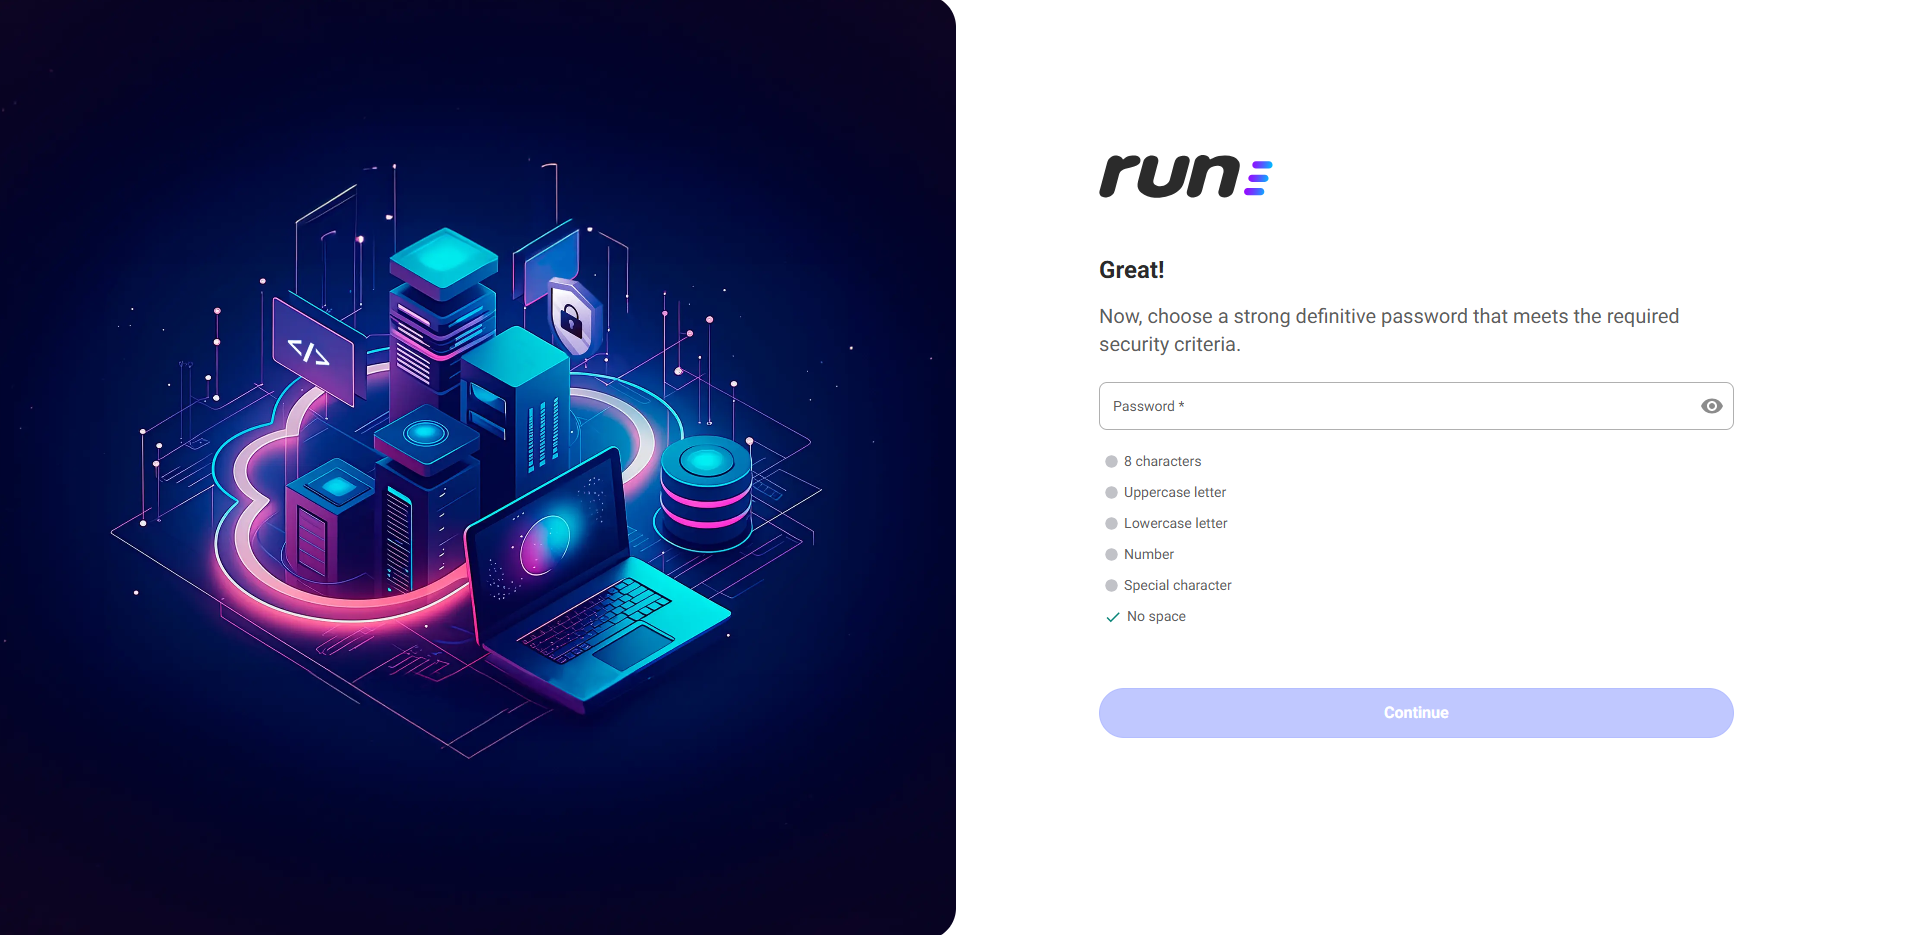
Now that you’ve completed the first access, it’s time to choose a final password. Follow the security criteria below to create a strong password:
-
Security Criteria for the Password:
- At least 8 characters.
- At least one uppercase letter.
- At least one lowercase letter.
- At least one number.
- At least one special character (e.g., @, #, !, etc.).
- No spaces at the beginning, between, or at the end of the password.
-
How to Create the Password:
- Enter your new password in the indicated field.
- Click the Continue button to complete and secure access to the platform.
1.4. Password Successfully Set!
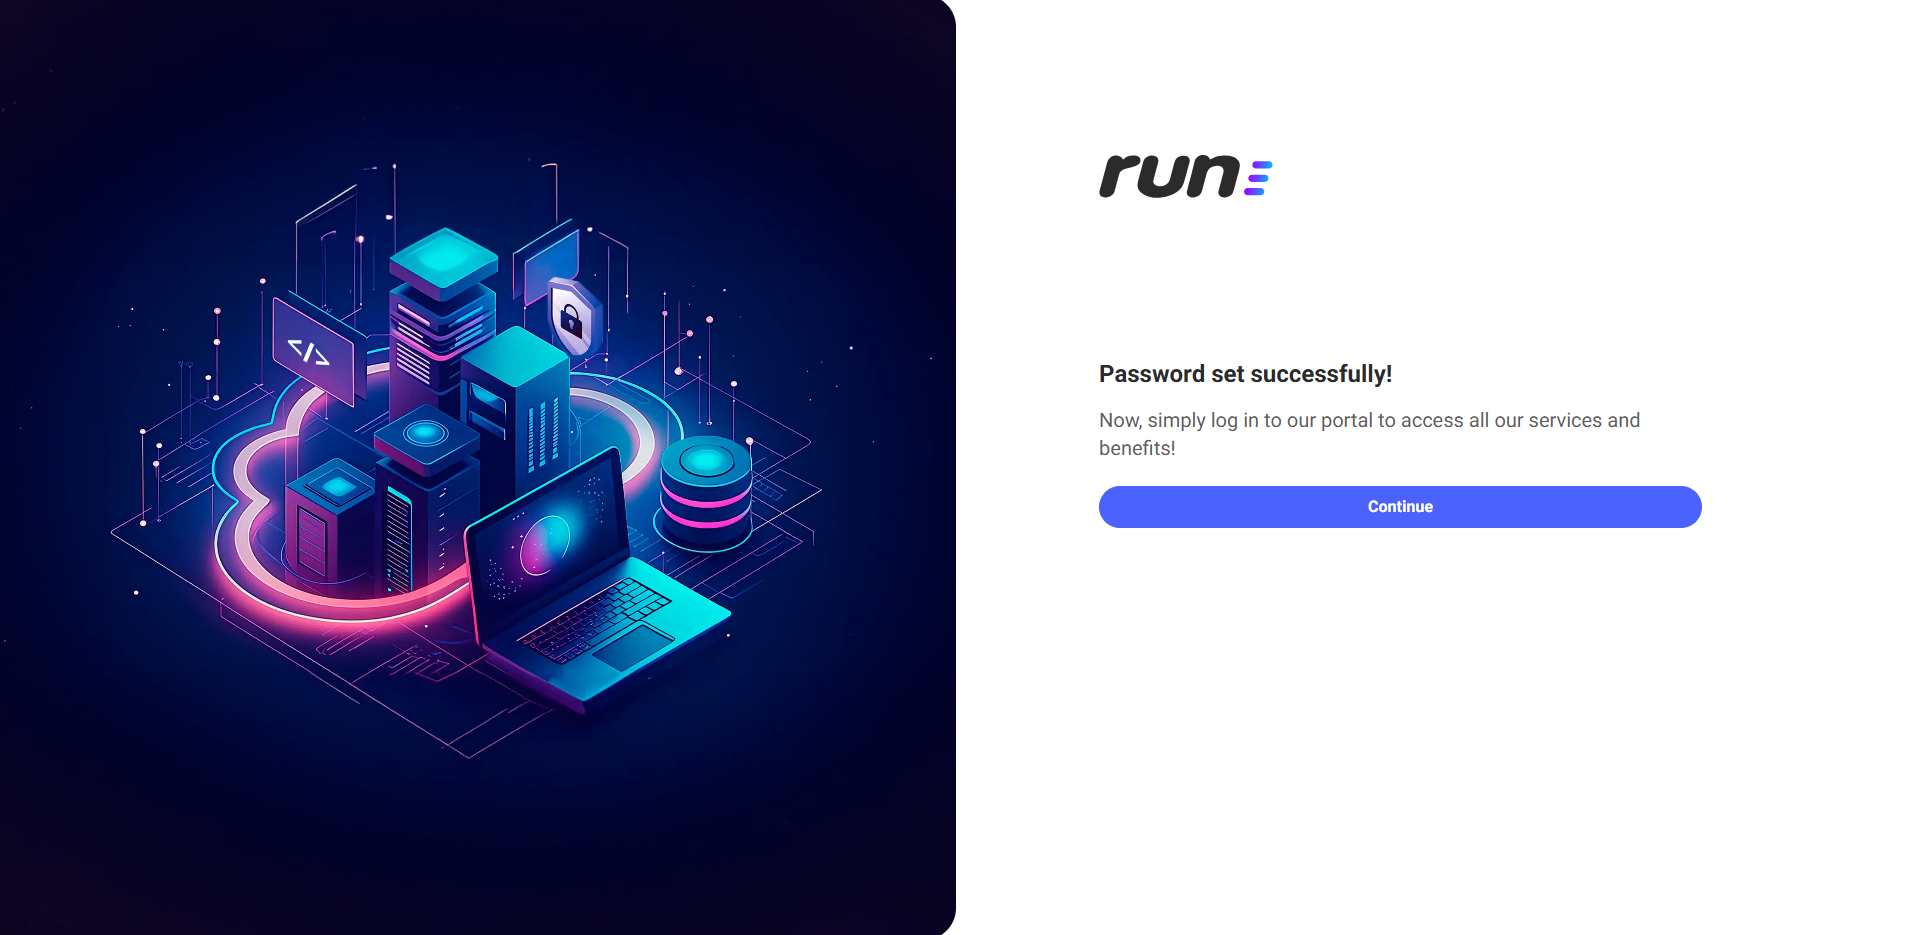
Now, just log in to our portal to access all our services and benefits!
- Click Continue and you will be redirected to the unified login screen.
1.5. Login
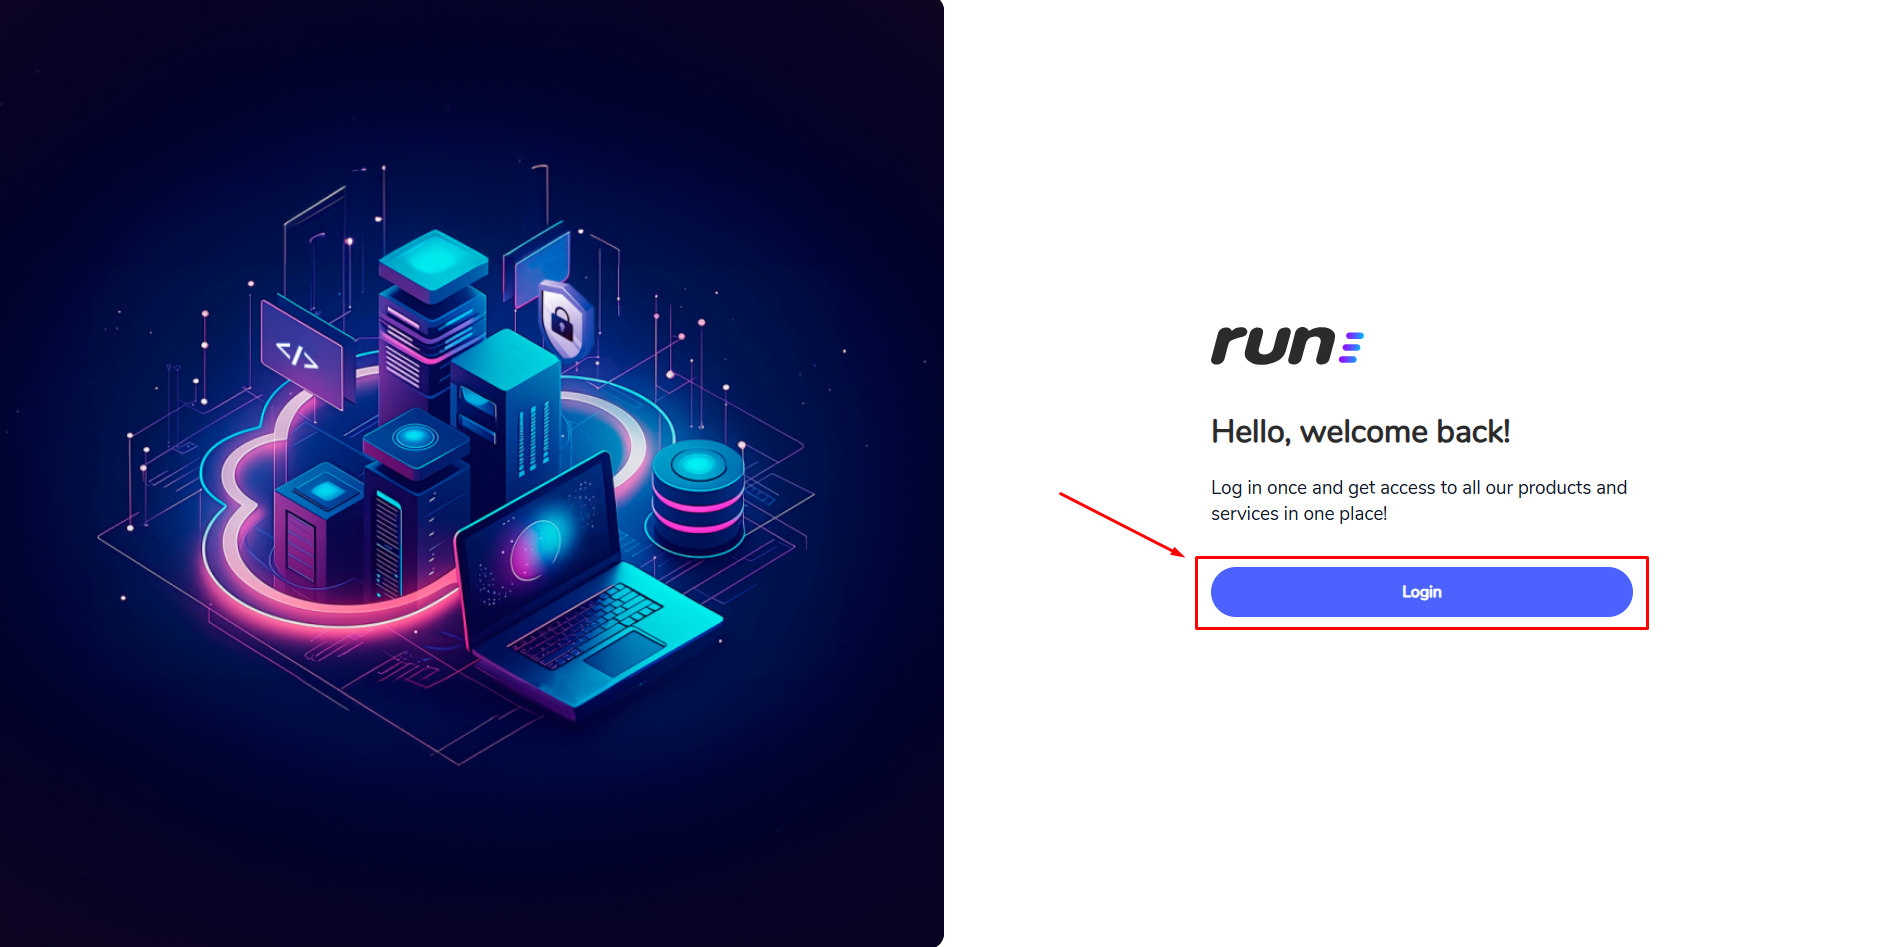
You can access all our products and services in one place, quickly and securely.
- To access the login screen, click the Login button.
- After clicking, the system will redirect you to the Login screen.
1.6. Login Screen
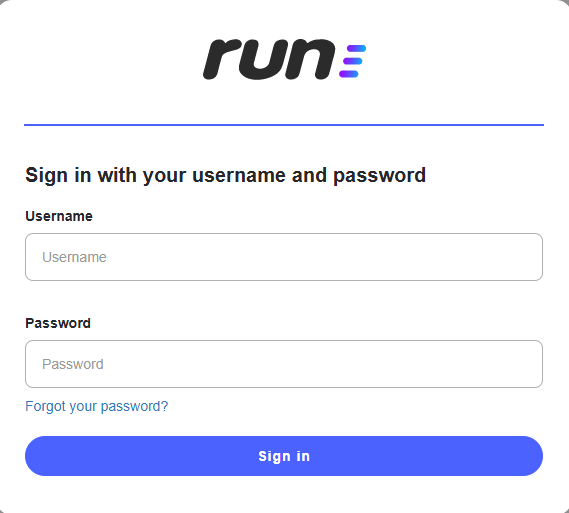
On the login screen, enter the registered email and the final password you created earlier to access the platform.
- Username: Field to enter your email.
- Password: Field to enter your password.
- After entering the details correctly, click the Sign in button to access the platform.
- After logging in, the system will redirect you to the Complete Your Registration screen.
- Link Forgot your password?: Click if you need to reset your password.
1.7. Complete Your Registration
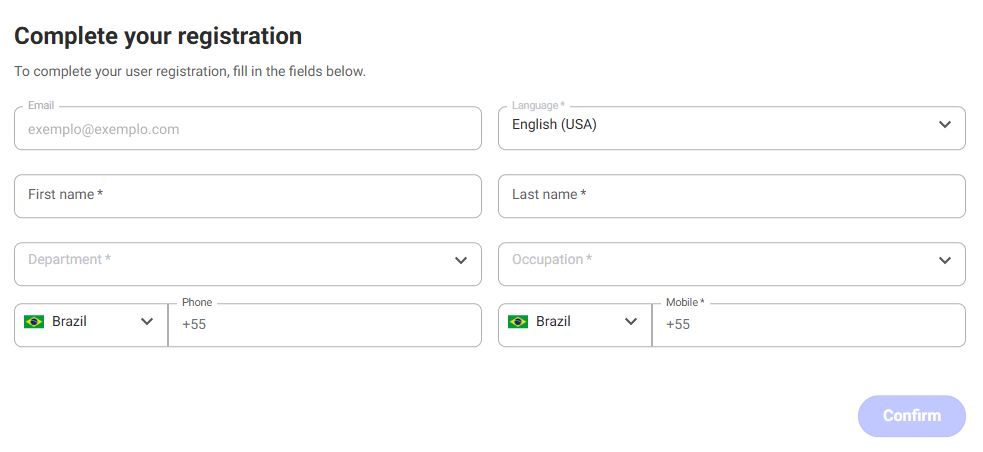
To finish the registration process, fill in the required fields below. These data are necessary to complete your profile and ensure that your account is ready for use.
Required Fields:
- Email: Your registered email will be displayed automatically, with no option to change.
- Language: Select your preferred language to use the platform. e.g., Portuguese (BR), English (US), Spanish.
- First Name: Enter your first name.
- Last Name: Enter your last name.
- Department: Select the department you belong to.
- Occupation: Enter your current position.
- Mobile: Add your mobile phone number for contact.
Optional Field:
- Phone: Add your phone number for additional contact.
After filling out all the required fields, click Confirm to complete your registration and access the platform. But if Multi-Factor Authentication (MFA) is required, you will be redirected to configure it.
2. Multi-Factor Authentication (MFA)
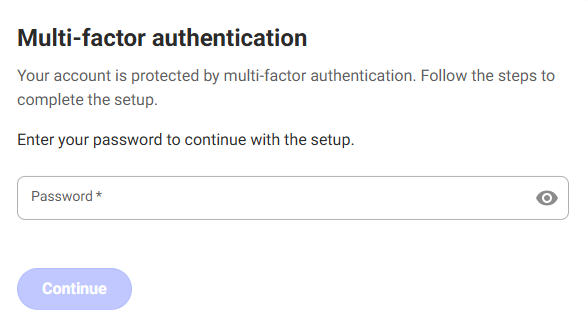
After completing your registration, if your user account requires Multi-Factor Authentication (MFA), you will need to follow the steps to finish the setup and ensure greater security.
- Multi-Factor Authentication (MFA) is a security method that requires more than one verification factor to ensure that only authorized users can access the system.
- With MFA, in addition to the traditional password, the user needs to provide a second form of authentication. Its implementation significantly reduces the risk of cyberattacks and strengthens platform security.
2.1. Benefits of MFA
- Increased security: Reduces the risk of breaches, even if the password is compromised.
- Protection against phishing attacks: Stolen passwords are not enough to access the account.
- Compliance with security regulations: Many regulations require MFA to protect sensitive data.
- Ease of implementation: It integrates with various authentication methods, offering flexibility for the user.
2.2. Multi-Factor Authentication Setup
- After entering your password, click Continue to proceed with the MFA setup.
2.3. MFA Setup Steps
Follow the steps below to complete the MFA setup:
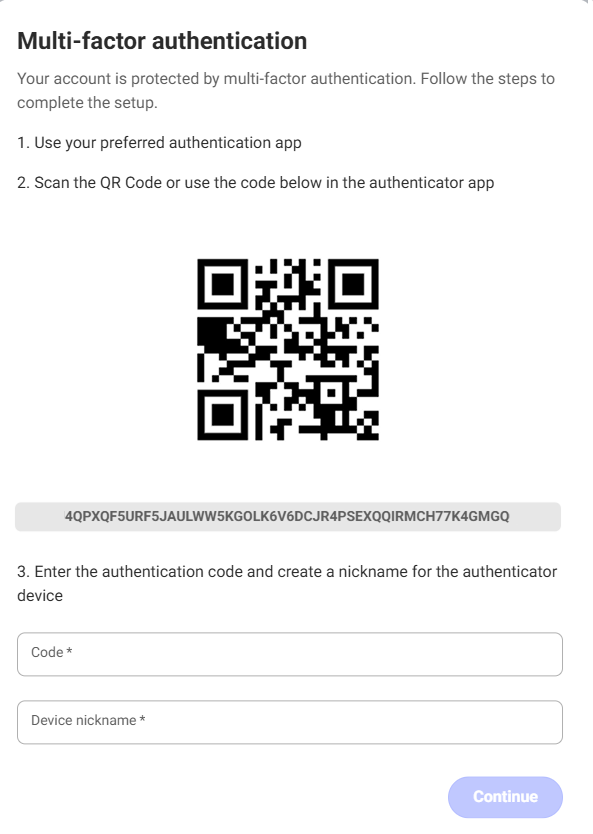
Step-by-Step: MFA Setup Steps
🔵Step 1 – Authentication Tool
If you do not yet have an authentication tool, we recommend choosing one of the following options to ensure better security:
- Microsoft Authenticator.
- Google Authenticator.
- Authy.
These are just a few recommended tools, but you can choose any other that suits your needs.
It’s worth noting that some of these tools also offer desktop versions.
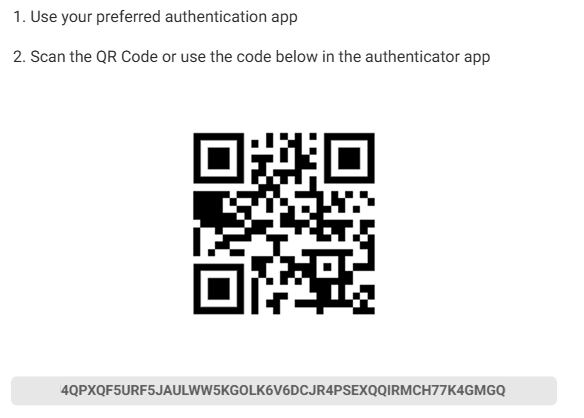
🔵Step 2 – Add the code to the authentication tool
- Open the authentication tool on your phone or browser.
- Scan the QR Code displayed on the screen using the phone’s camera or browser functionality.
- If the QR Code doesn’t work, copy and manually enter the code displayed on the screen.
🔵Step 3 – Generate the authentication code
- After scanning the QR Code or entering the code manually, the authentication tool will display a 6-digit code.
- Enter this code in the Code field on the screen.
- In the Device Nickname field, enter a name to identify this device (e.g., Personal Phone or iPhone John).
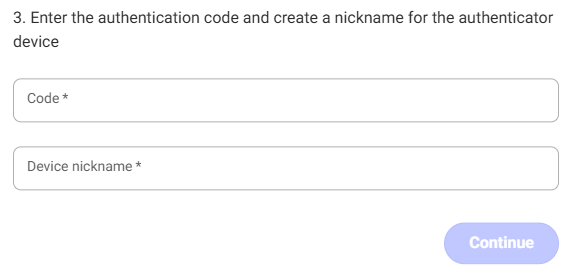
🔵Step 4 – Complete the setup
Make sure both fields are filled in:
- Authentication code.
- Device nickname.
- Click Continue to finish the setup.
3. Accessing the Run Platform
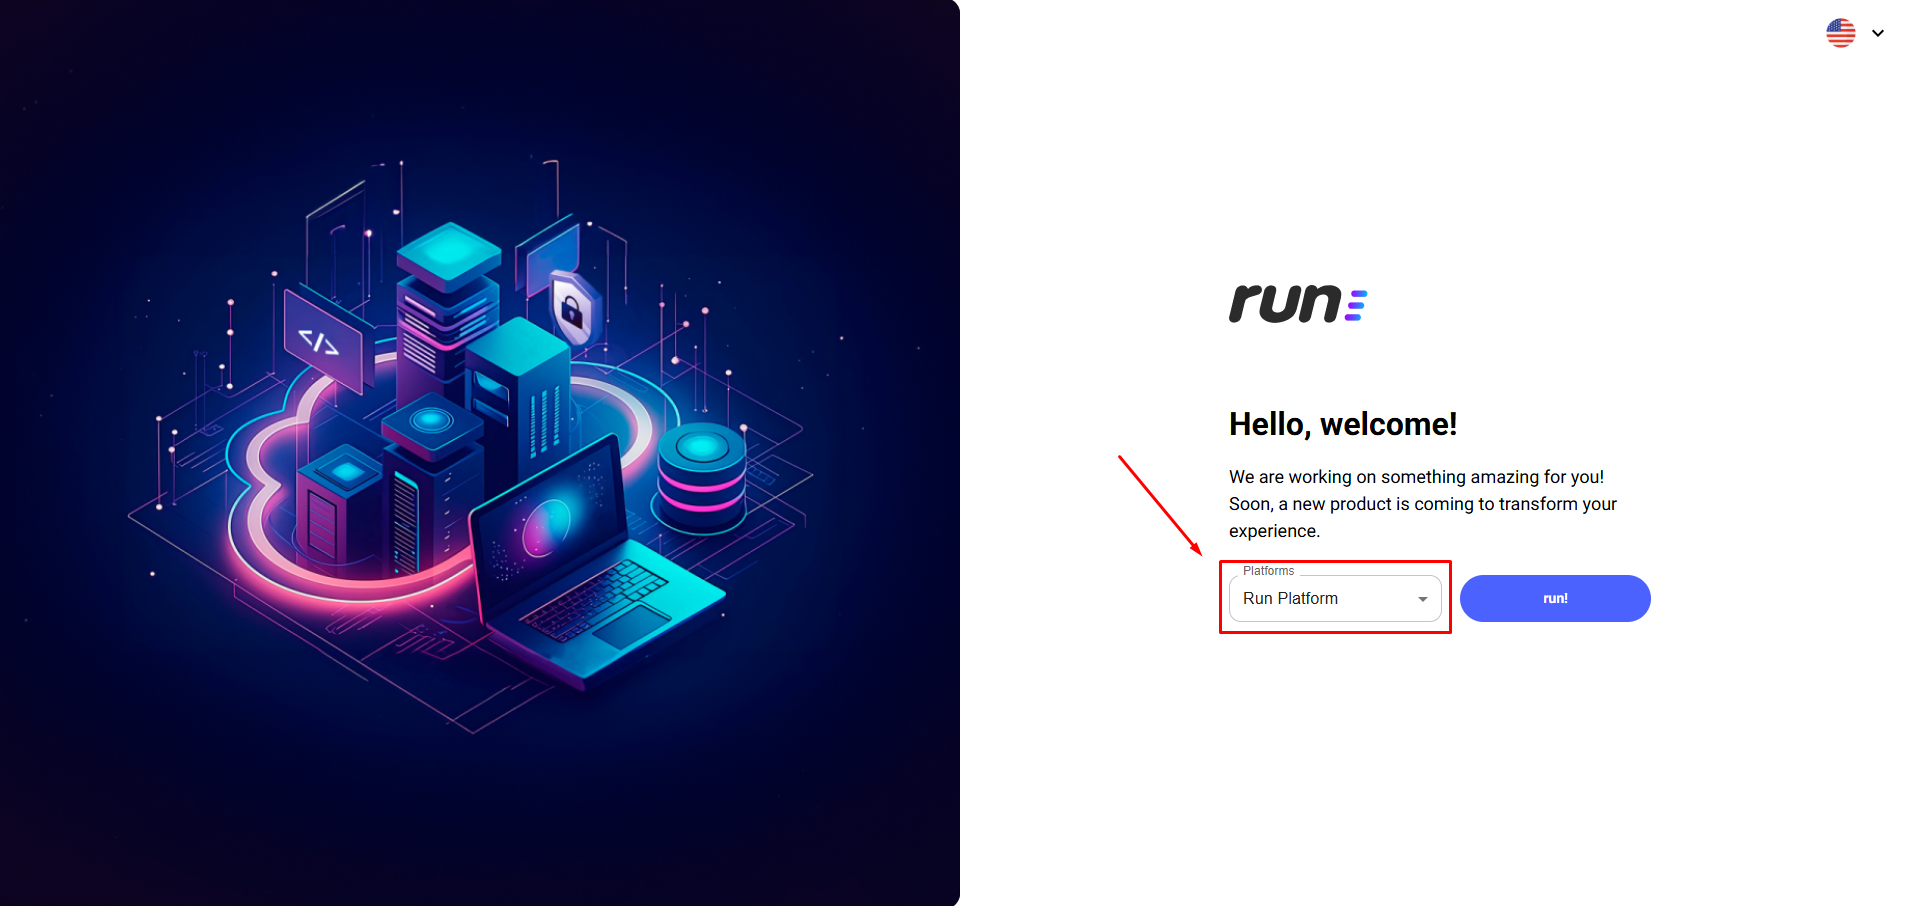
Users who have completed the registration, set a final password, and configured Multi-Factor Authentication (MFA), if applicable, can access the platform through the link: run.wevy.cloud.
- On this screen, you can select which platform you want to access. The available options are:
- Run Platform
- Run Stack
- Run Cloud Mexico
- To access the Run Platform, follow these steps:
- Click on the Run Platform option in the platforms section.
- Then, click the run! button.
- You will be redirected to the unified login screen.
3.1. Login
Click the Login button to be redirected to the login screen.
3.2. Login Screen
On the login screen, enter your registered email and password. Then, click Sign in to access the platform.
- MFA Disabled: You will be directly redirected to the platform’s main screen.
- MFA Enabled: A screen will appear asking for the authentication code.
3.3. Multi-Factor Authentication (MFA)
If your user account has Multi-Factor Authentication (MFA) enabled, you will be asked to enter the authentication code after logging in.
- Open the authenticator tool you configured during the MFA process and copy the code generated.
- Then, enter the code on the MFA screen and click Sign in to access the platform.

Remember: the generated code changes every few seconds, so always use the most recent code.
4. Password Recovery
If you forgot your password, you can request a reset directly from the login screen. A code will be sent to your email, allowing you to create a new password.
4.1. Password Reset Request
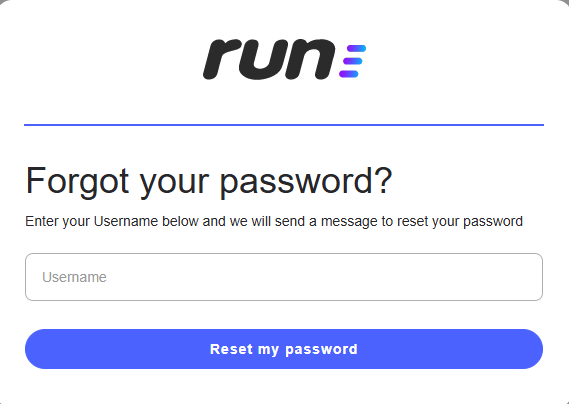
- On the login screen, click "Forgot your password?".
- The Forgot your password? screen will open.
- Enter your email and click Reset my password.
- A password reset code will be sent to your email.
4.2. Receiving the Password Recovery Email
After requesting the password recovery, you will receive an email with a recovery code. The code will be used to reset your password.
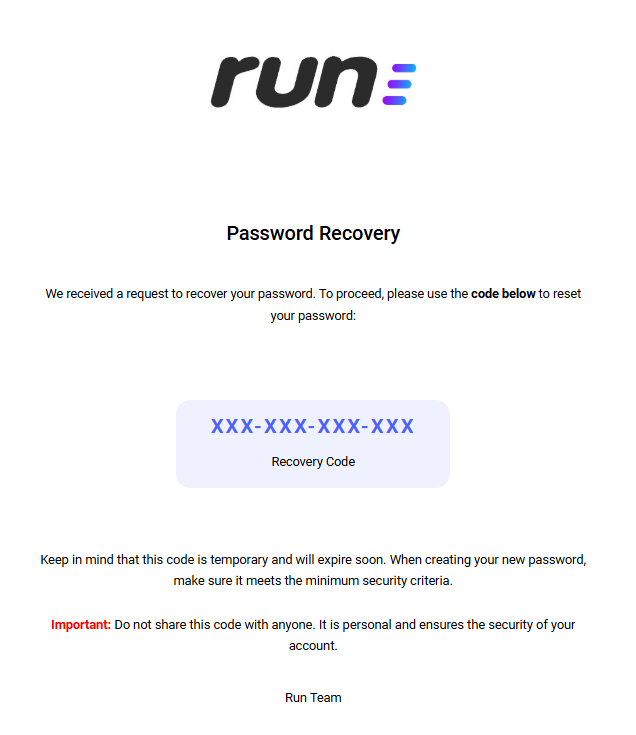
- When copying the recovery code, make sure there are no additional spaces when pasting it.
- If you don’t receive the email, check the spam folder.
- The recovery code in the image is for illustration purposes only.
- This code is temporary and will expire soon, so it’s important to use it as quickly as possible.
4.3. Password Reset
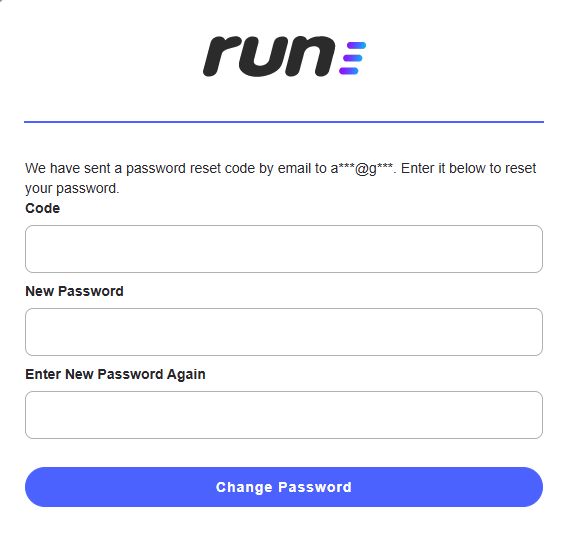
On the password reset screen, enter the reset code in the indicated field.
-
After entering the code, you will be asked to create a New Password.
-
Security Criteria for the Password:
- At least 8 characters.
- At least one uppercase letter.
- At least one lowercase letter.
- At least one number.
- At least one special character (e.g., @, #, !, etc.).
- No spaces at the beginning, between, or at the end of the password.
-
Confirming the Password: You will need to enter the new password again in the Confirm Password field to ensure both match.
-
Completing the Process: After confirming the password is correct and meets the requirements, click Change Password to complete the reset process.
-
You will be redirected to the Login screen, where you can access the platform using your new password.
5. Changing the Password
When a user’s password is reset on the Run Platform, an email will be automatically sent to the user with a temporary password.
5.1. How to Change the Password on the Run Platform
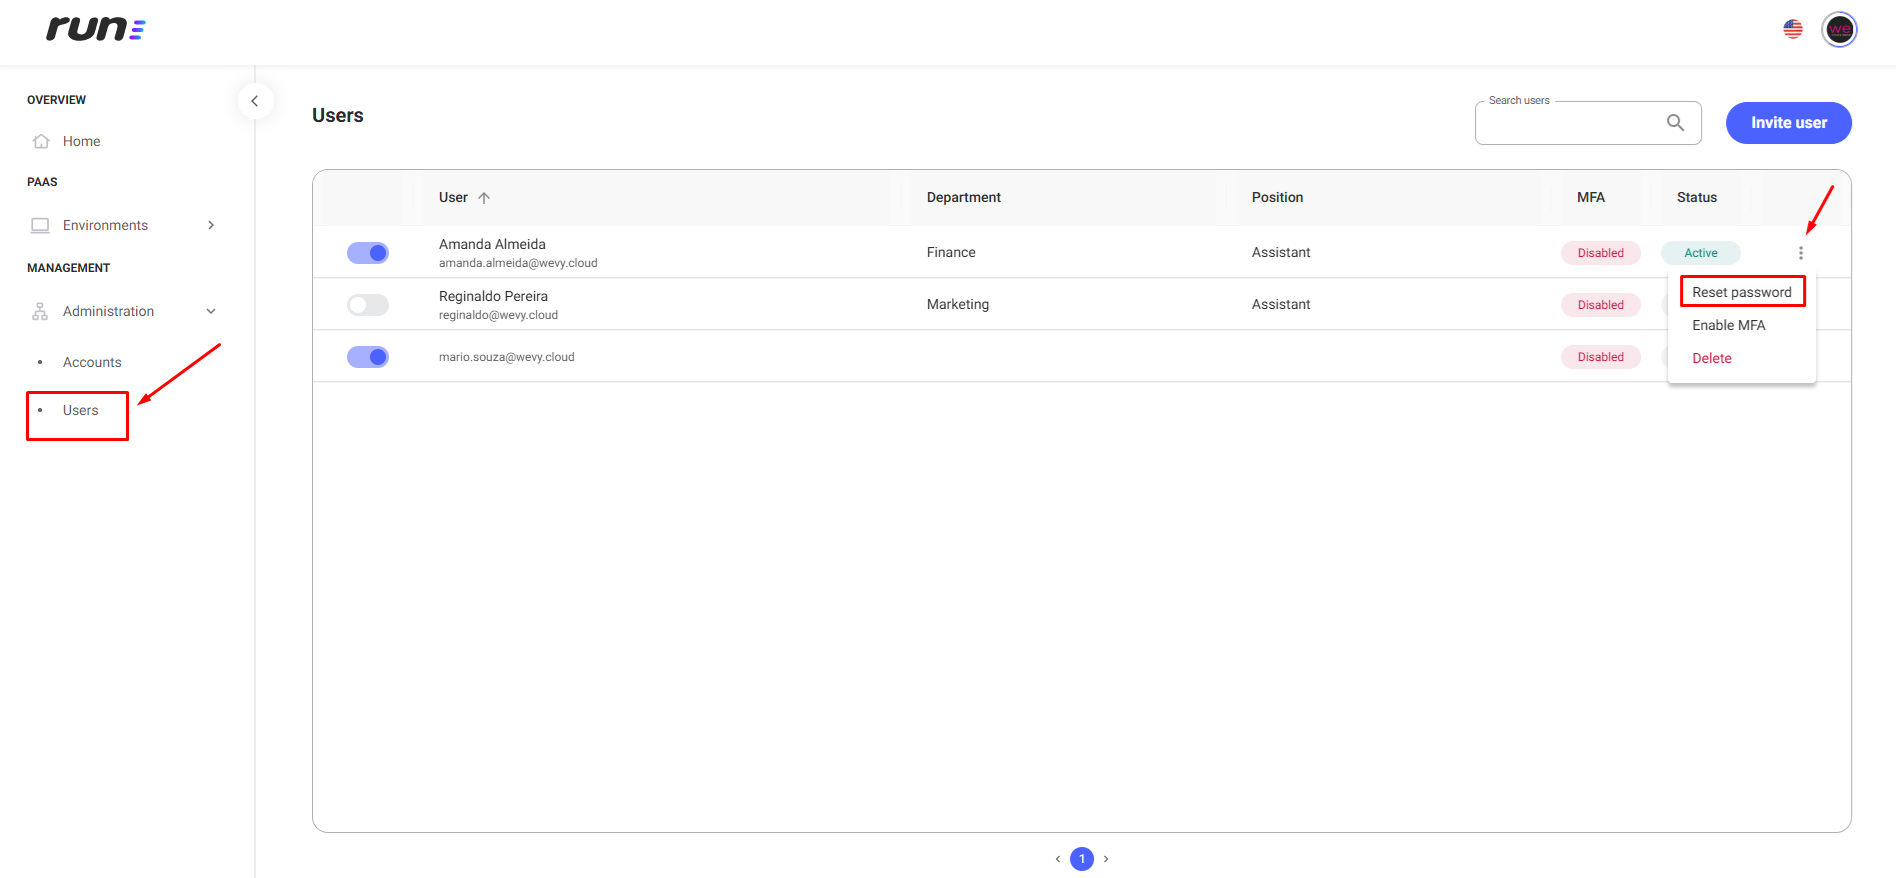
The password change is done directly on the Run Platform, on the user screen, through the option Actions available in User > Reset password. Follow these steps to complete the process:
- Access the user screen on the Run Platform.
- In the Actions menu, select the option Reset password.
- This will invalidate the current password, and the user will receive a new password by email to access the system.
5.2. Receiving the Password Change Email
- The email will provide a temporary password that will allow you to access the system to reset your password.
- The temporary password is valid for a limited time. Once logged in with it, you will be prompted to create a new password that meets the security criteria.
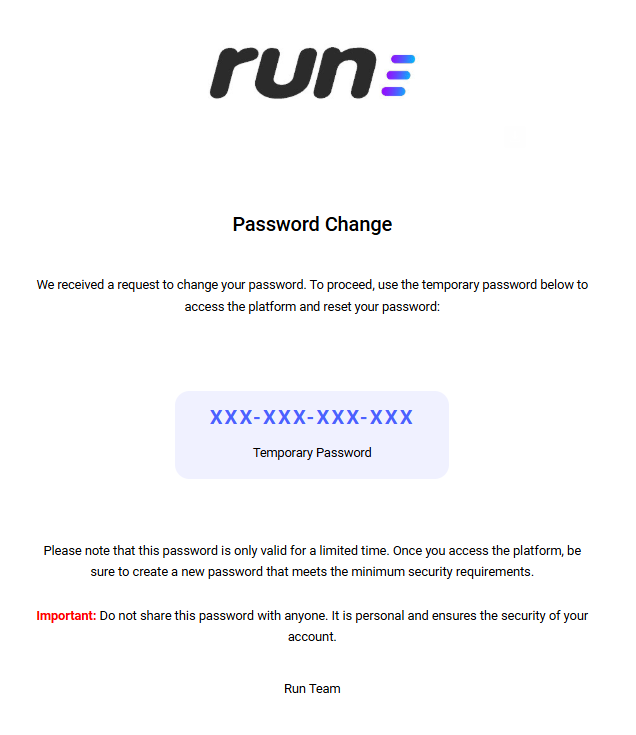
- When copying the temporary password, make sure there are no additional spaces when pasting it.
- If you don’t receive the email, check the spam folder.
- The temporary password in the image is for illustration purposes only.
5.3. Accessing the Platform with the Temporary Password
On the login screen, enter your registered email and the temporary password received via email. Then, click Sign in.
- After entering the temporary password, the screen to set a new password will be displayed.
5.4. Creating a New Password
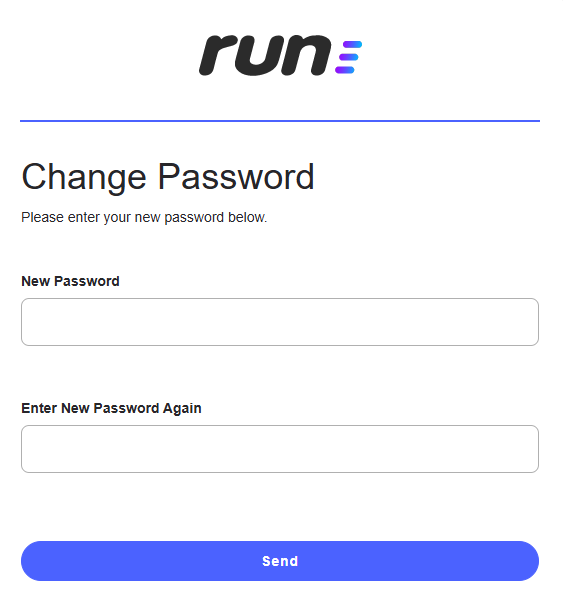
- After entering the temporary password, you will be redirected to the Change Password screen.
-
In the new password field, set a new password that meets the security criteria.
-
Security Criteria for the Password:
- At least 8 characters.
- At least one uppercase letter.
- At least one lowercase letter.
- At least one number.
- At least one special character (e.g., @, #, !, etc.).
- No spaces at the beginning, between, or at the end of the password.
-
Confirming the Password: You will need to enter the new password again in the Confirm Password field to ensure both match.
-
Completing the Process: After confirming that the password is correct and meets the requirements, click Send to complete the reset process.
-
The system will be redirected to the Run Platform’s main screen.