Users
Allows management of users linked to the company, granting them access to use the Run platform.
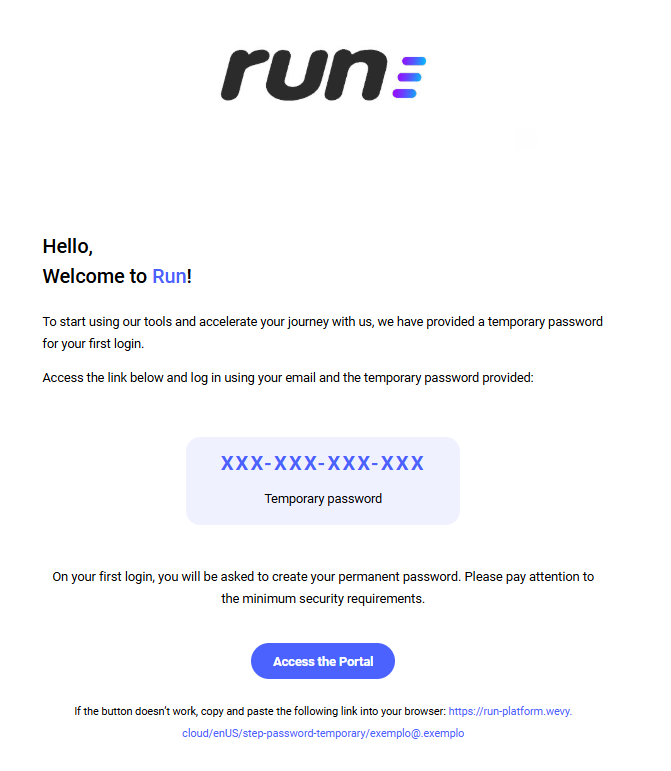
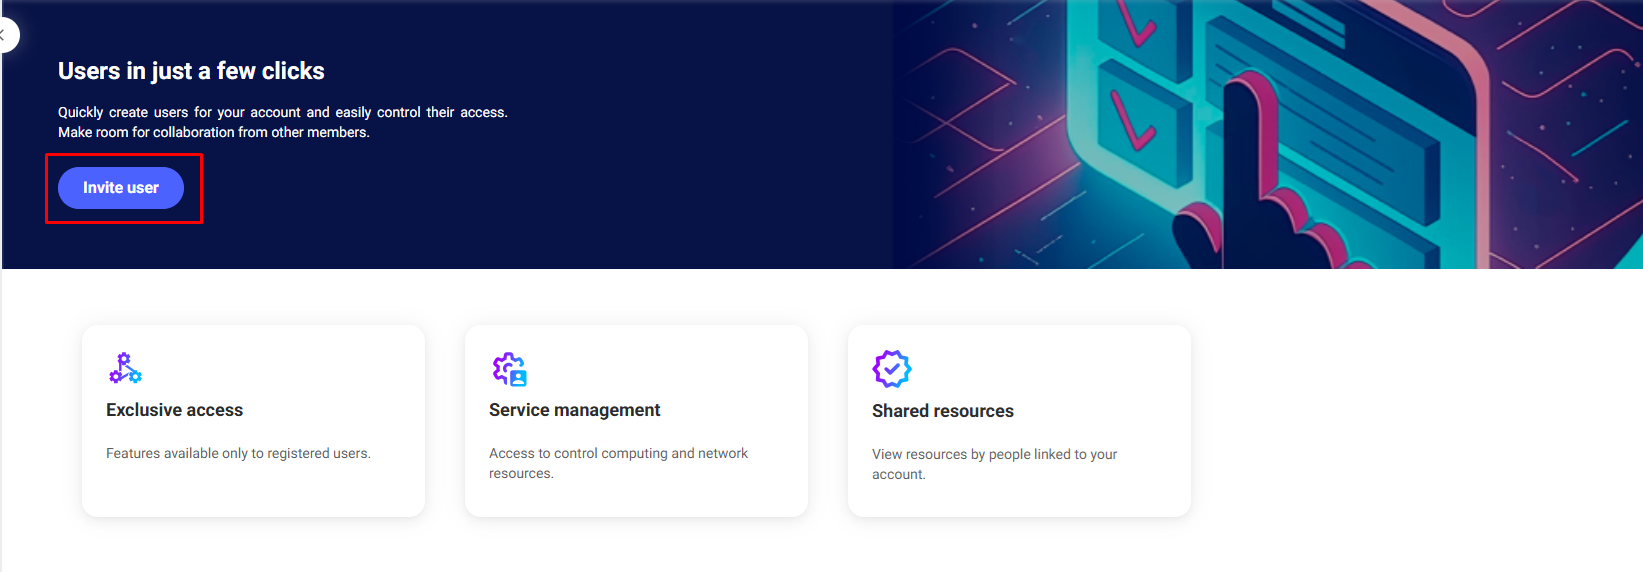
When no users are registered, this screen will be displayed.
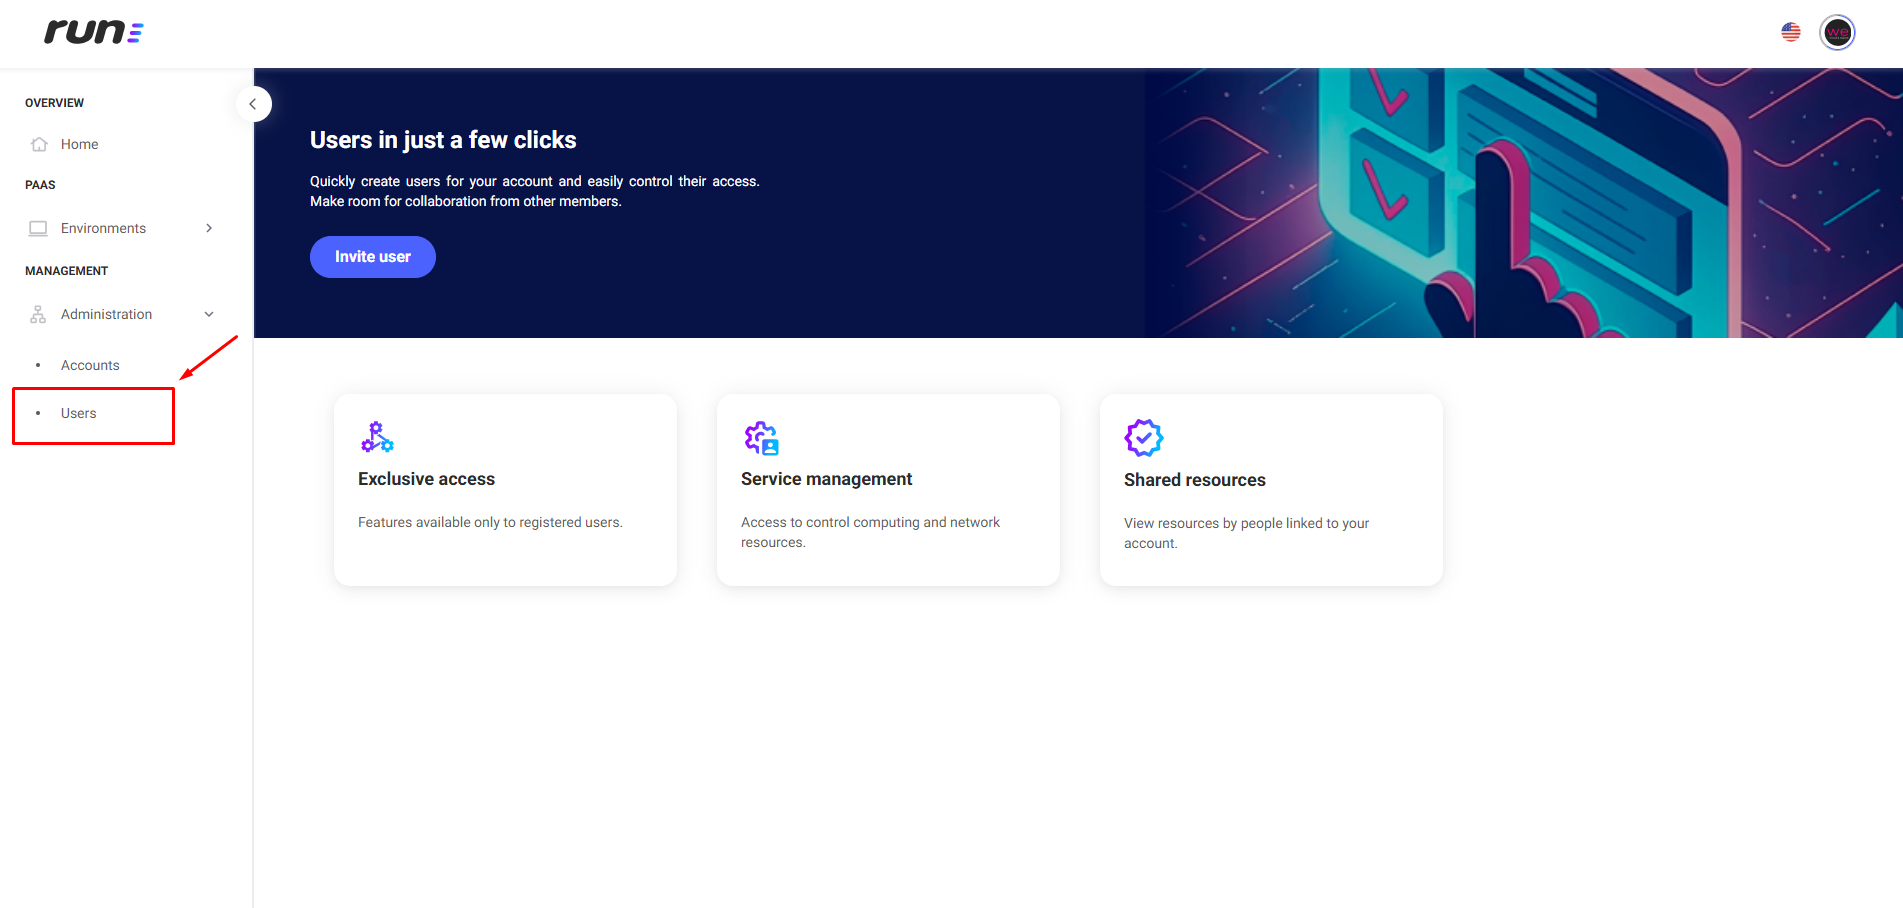
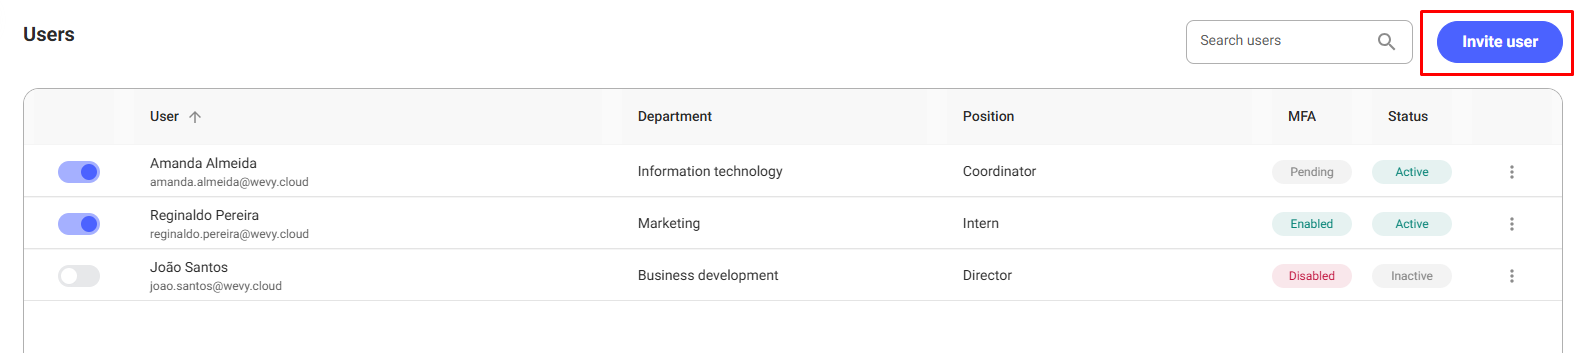
When users are registered, this screen will be displayed.
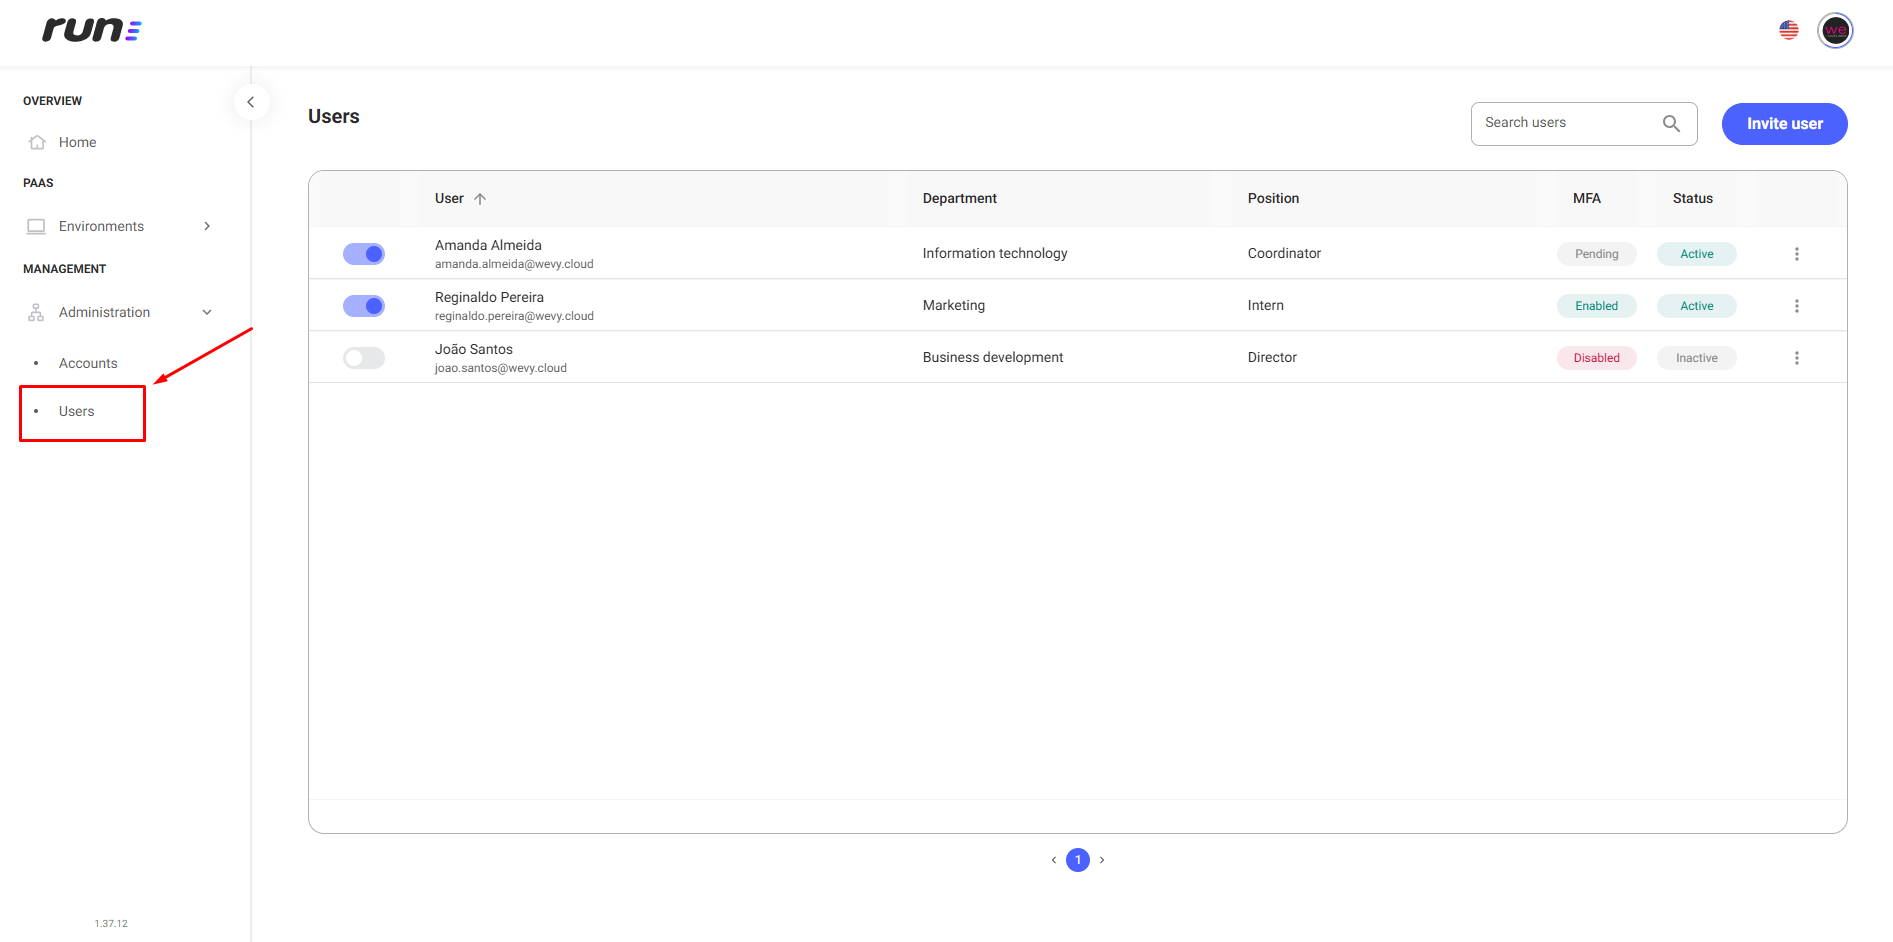
1. Search Bar
- Located in the upper right corner, the search bar allows the user to search for specific users by Name or Email, or by part of the Name or part of the Email.
- The search field displays the placeholder text Search for users, guiding the user on how to search.
2. User Table
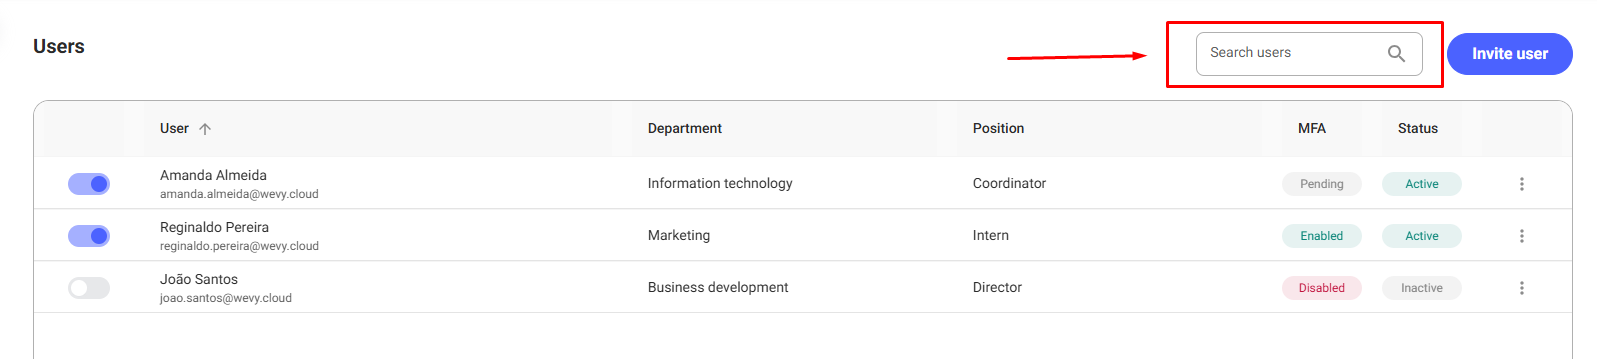
The table lists all users linked to the company.

The table contains the following columns:
| Column | Description |
|---|---|
| User | Displays the name and email of the registered user. |
| Department | Indicates the area or department the user belongs to within the organization. |
| Role | Indicates the job title or position of the user. |
| Multi-factor Authentication (MFA) | Shows the MFA status: - Enabled: MFA is active for the user. - Disabled: MFA is not enabled. - Pending: User has not yet set up MFA. |
| Status | Indicates the user's account status: - Pending: The user is waiting for activation and has not completed the invitation process. - Active: The user has system access. - Inactive: The user was manually deactivated. |
2.1. Status
There is a button to the left of the user's name that allows you to activate or deactivate their access. When triggered, the change is automatically reflected in the Status column.

Step-by-step to activate or deactivate a user
Step 1. Click the Activate  or Deactivate
  button located to the left of the user's name.

Step 2. Complete the action
- When the action is activation, the change will be applied automatically.
- When the action is deactivation, a confirmation screen will appear:
- Click Confirm to deactivate the user.
- Click Cancel to cancel the action and keep the user active.
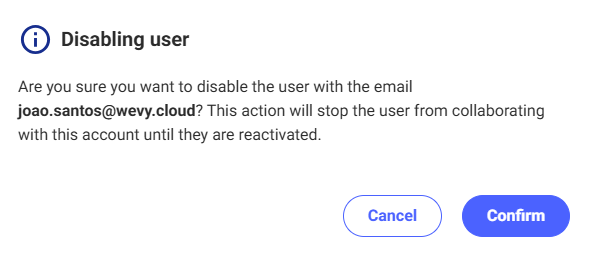
When a user is deactivated, they lose access to the system and can only return after being reactivated.
3. Available User Actions
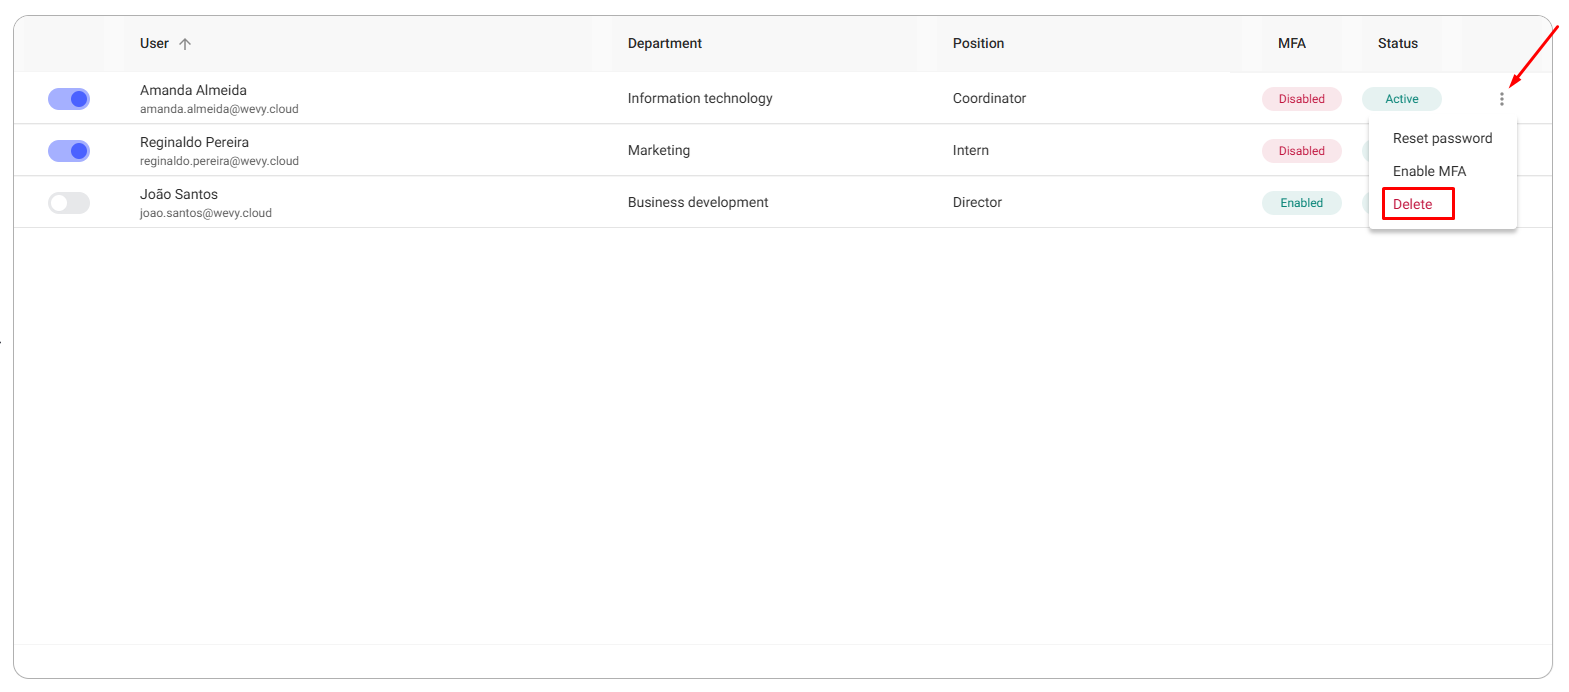
The Actions menu (three dots) next to each user offers additional actions. When clicked, the following options appear:
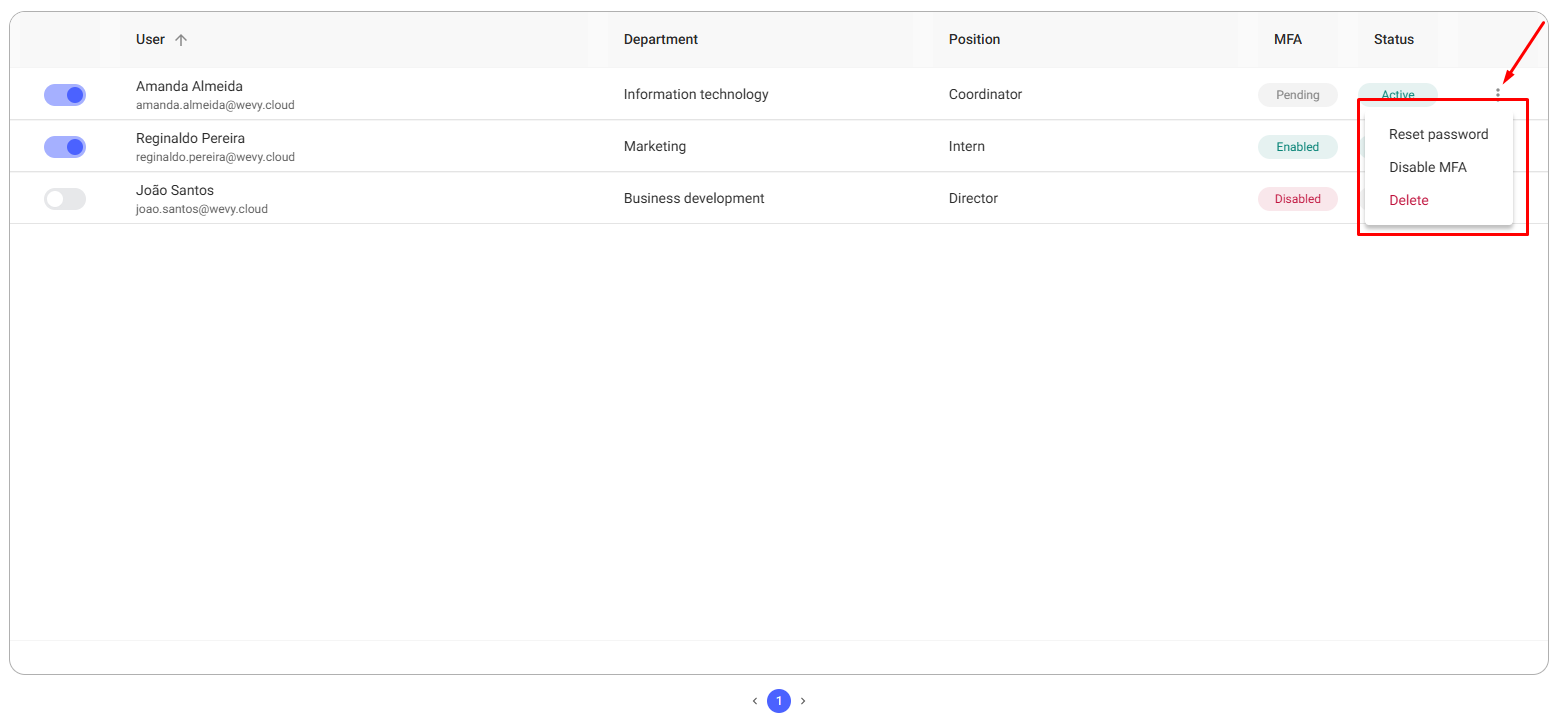
Available Actions
| Action | Description |
|---|---|
| Reset Password | Allows resetting the user's current password. |
| Enable/Disable MFA | Enables or disables MFA for the user. |
| Delete User | Removes the user from the list. This action is irreversible. |
3.1. Reset Password
This action will invalidate the current password and send a new password to the user's email.
Step-by-step to Reset Password
Step 1. Click the Reset Password button
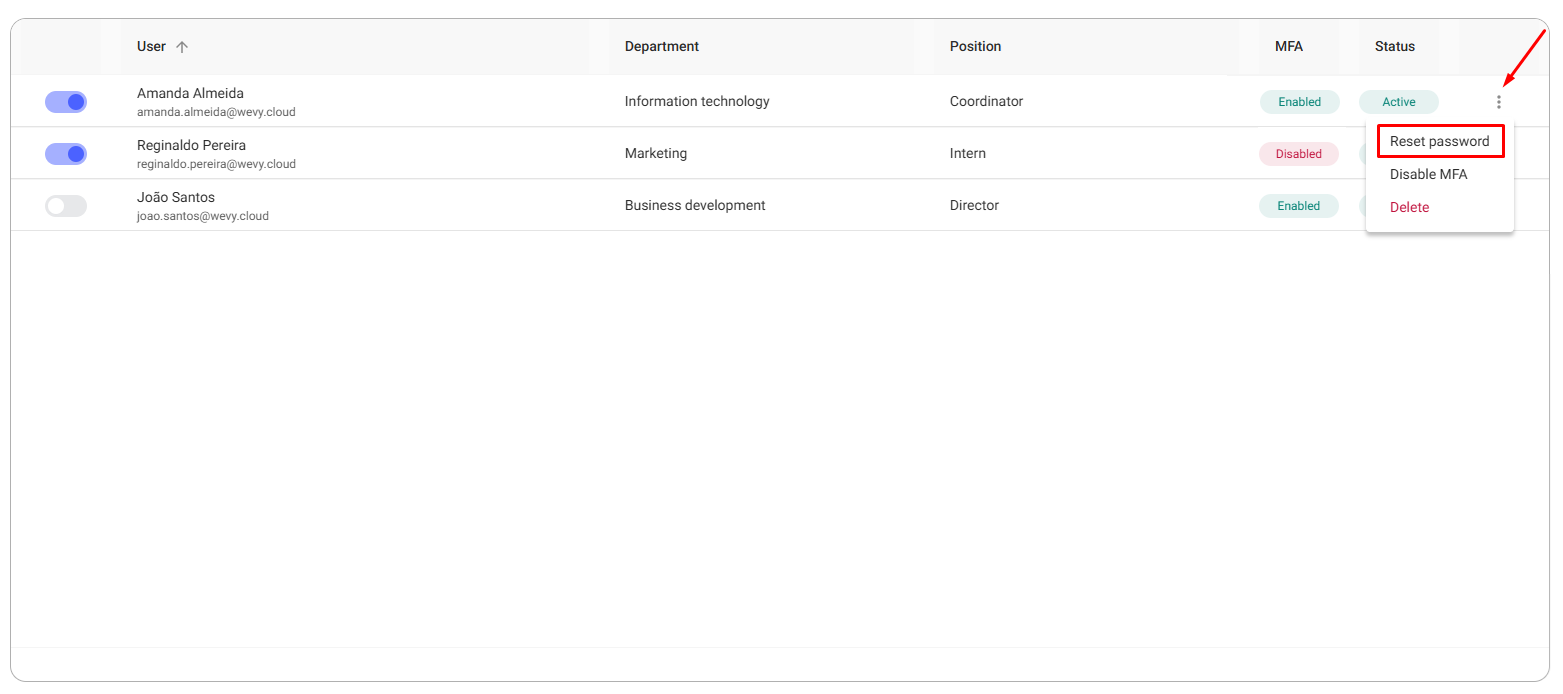
Step 2. A confirmation screen will appear.
- Click Confirm to reset the password.
- Click Cancel to cancel the action.
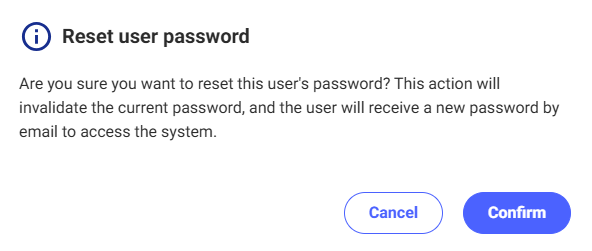
Resetting the password is irreversible. The user will only be able to access the Run Platform with the new password sent by email.
3.2. Enable/Disable MFA
Allows enabling or disabling multi-factor authentication (MFA) to increase user account security.
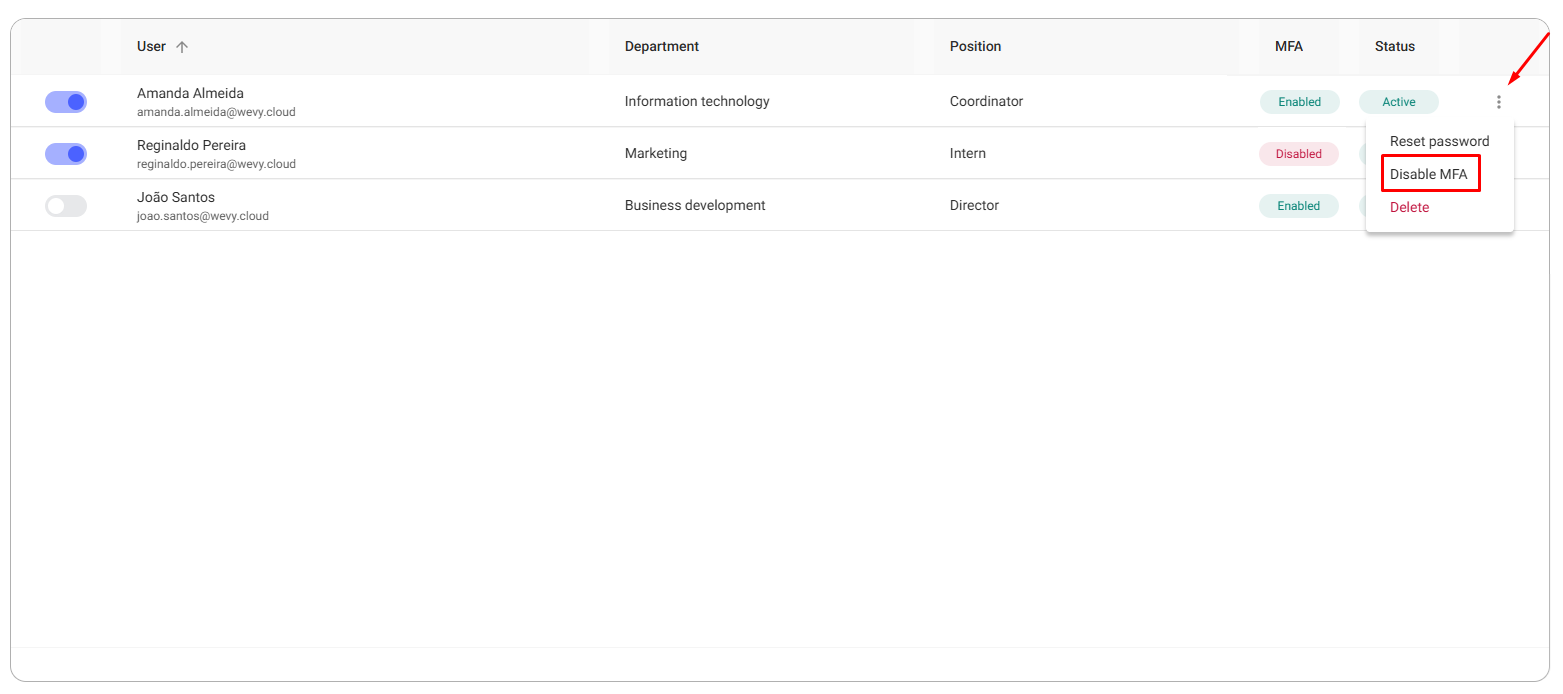
Step-by-step to Disable MFA
Step 1. Click the Disable MFA button, available when MFA is enabled.
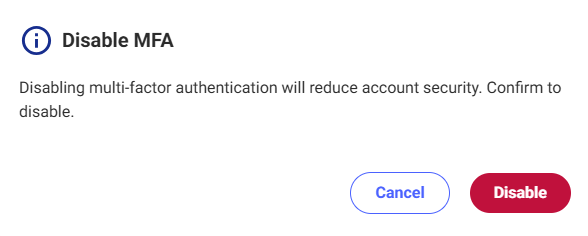
Step 2. The confirmation screen will be displayed.
- Click Disable to confirm.
- Click Cancel to cancel the action.
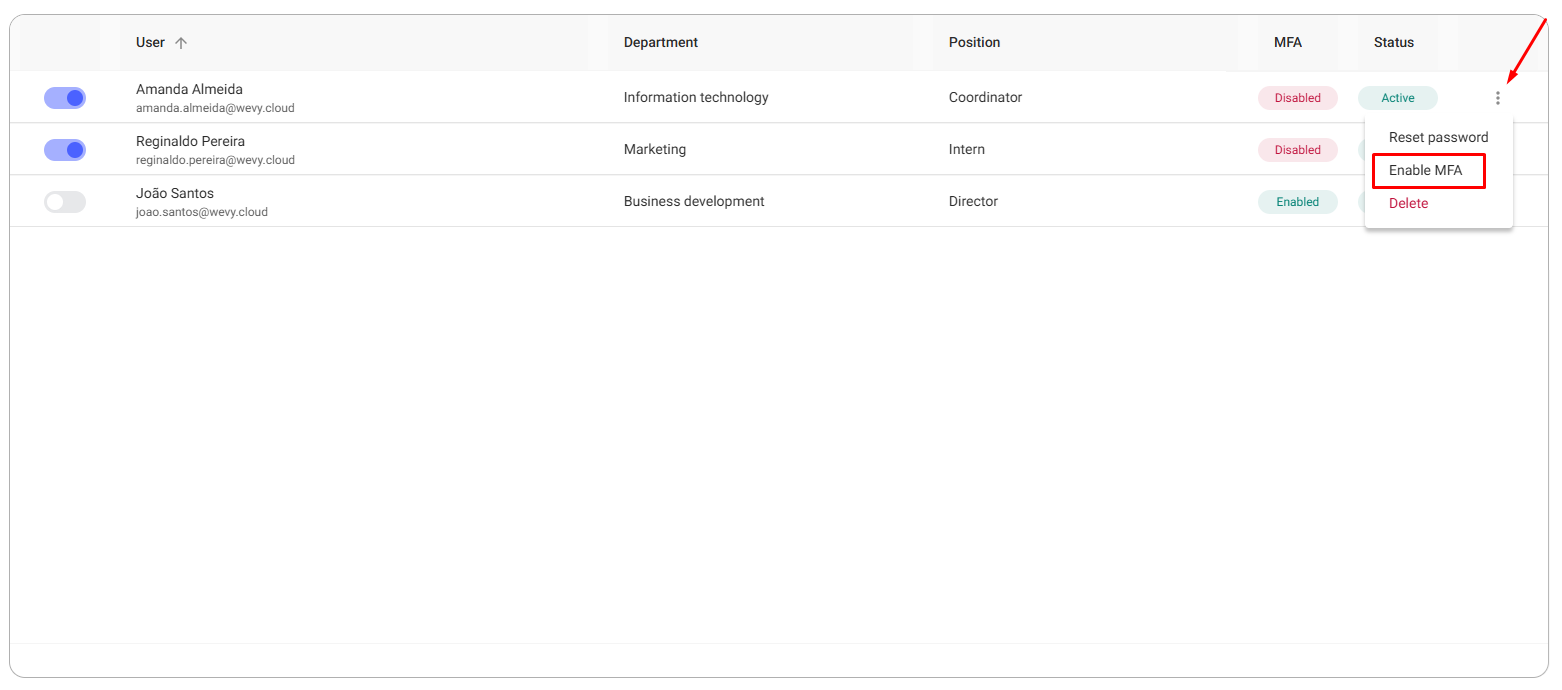
Step-by-step to Enable MFA
Step 1. Click the Enable MFA button, available when MFA is disabled.
Step 2. The confirmation screen will be displayed.
- Click Enable to activate MFA.
- Click Cancel to cancel the action.
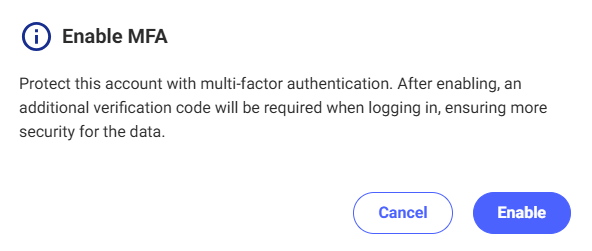
After enabling MFA, the user will only be able to access the platform with both authentication factors (password + MFA).
3.3. Delete User
This action is irreversible.
Step-by-step to delete a user
Step 1. Click the Delete button
Step 2. The delete confirmation screen will appear.
- Enter the exact email of the user in the field provided.
- Once entered correctly, the Delete button will be enabled.
- Click Delete to confirm.
- Click Cancel to cancel the action.
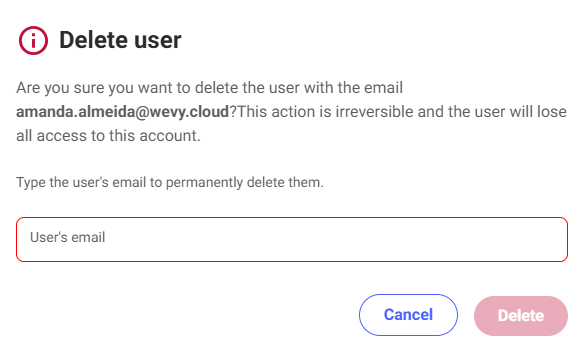
The deletion is irreversible. The user will lose all access to the Run Platform after removal.
4. Invite a New User
The Invite User screen allows you to add new users to your account.
After filling in the fields and confirming, the system automatically sends an invitation email to the provided address.
Step-by-step to Invite a New User
Step 1. Access the invite option
- Access the Invite User button when there are no users registered.
- Click the Invite User button
- Access the Invite User button when users are already registered.
- Click the Invite User button
Step 2. Fill out the fields and complete the action
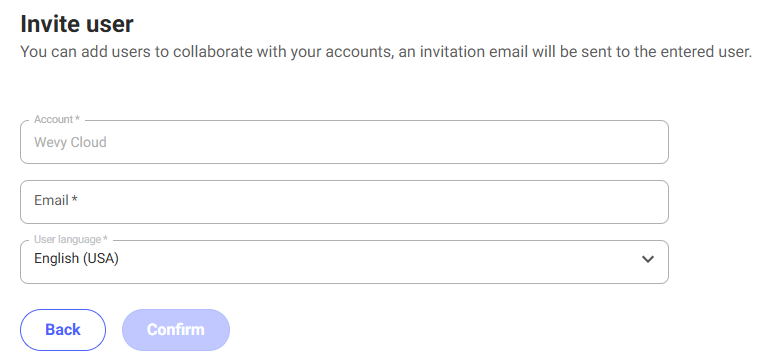
- The invitation screen will appear:
- Account: Displays the account the user will be linked to.
- Email: Enter the email address of the user who will receive the invitation.
- User Language: Language in which the user will view the platform interface (Portuguese, English, or Spanish).
Confirm or Go Back
- Click Back to cancel the action.
- Click Confirm to send the invitation and allow the user to collaborate with the account.
Step 3. Invitation status
- After clicking Confirm, the user will receive an invitation email with a temporary password to access the system and complete their registration.
- The user will remain in Pending status until they activate their account.
- Check documentation:
- For more information about Login ➡️ click here.