Accounts
In this section, you can register and view clients linked to your company, making it easier to link new environments to them.
When a user is linked to a company with the CLIENT profile, they will only be able to view the information of the company associated with their profile, without access to other accounts registered in the system.
When there are no registered accounts, this screen will be displayed.
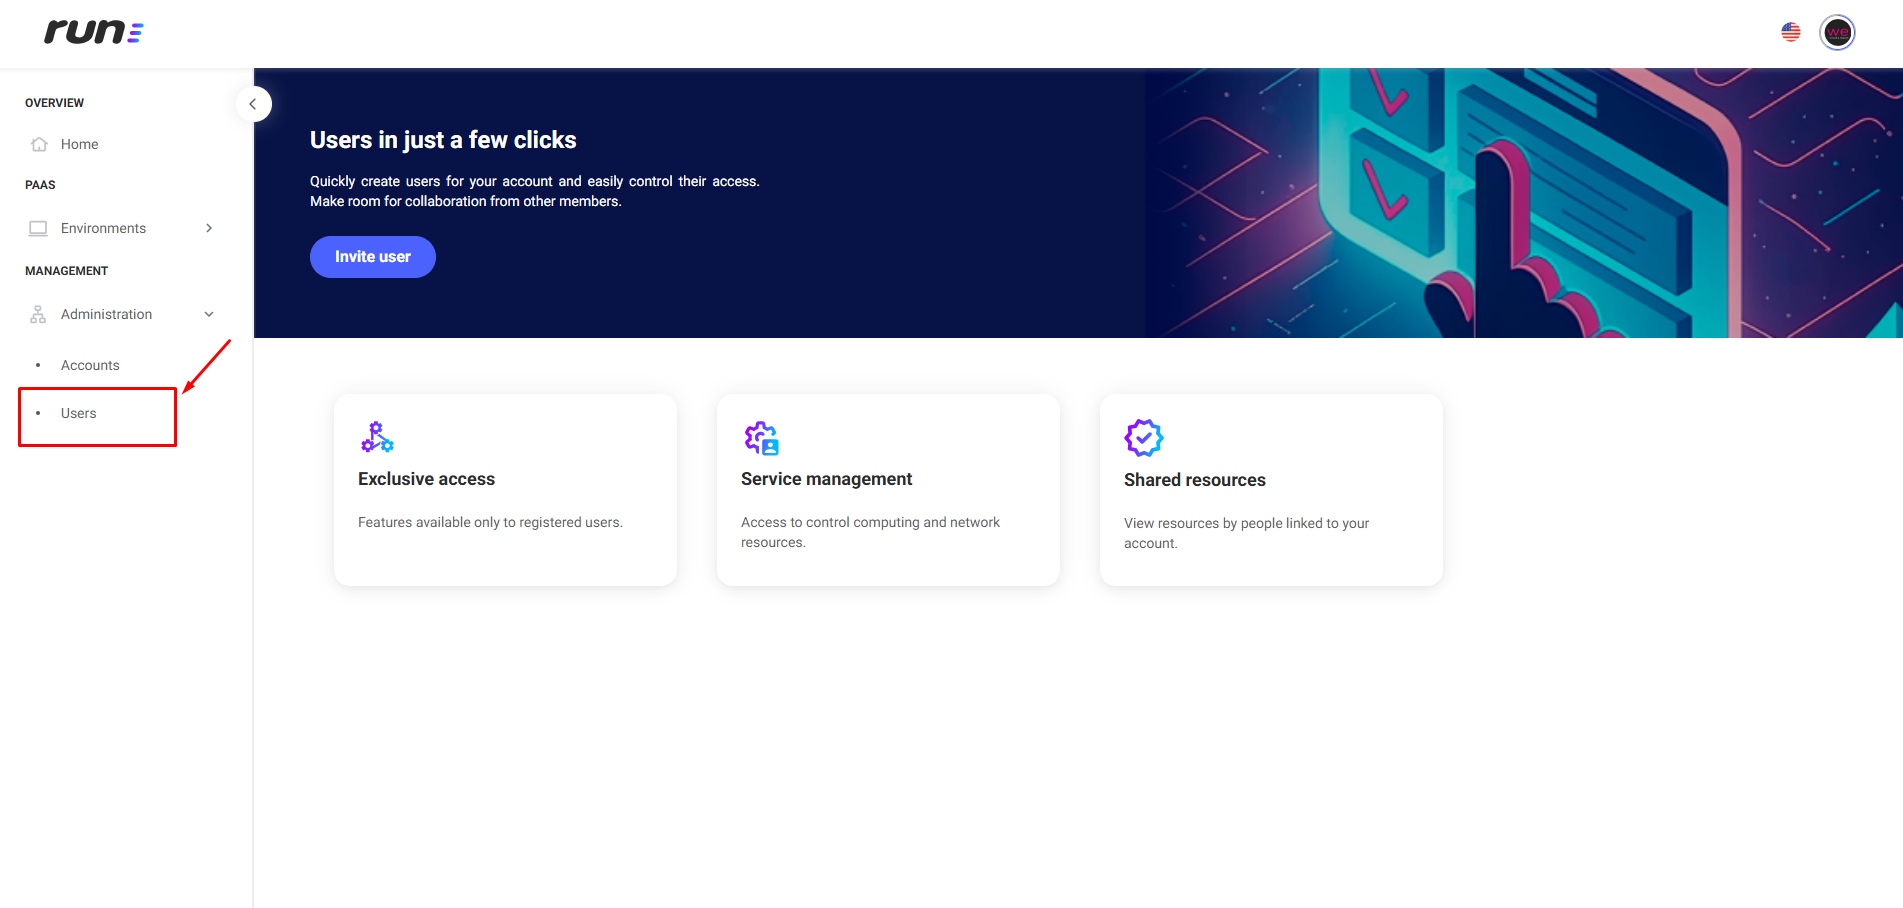
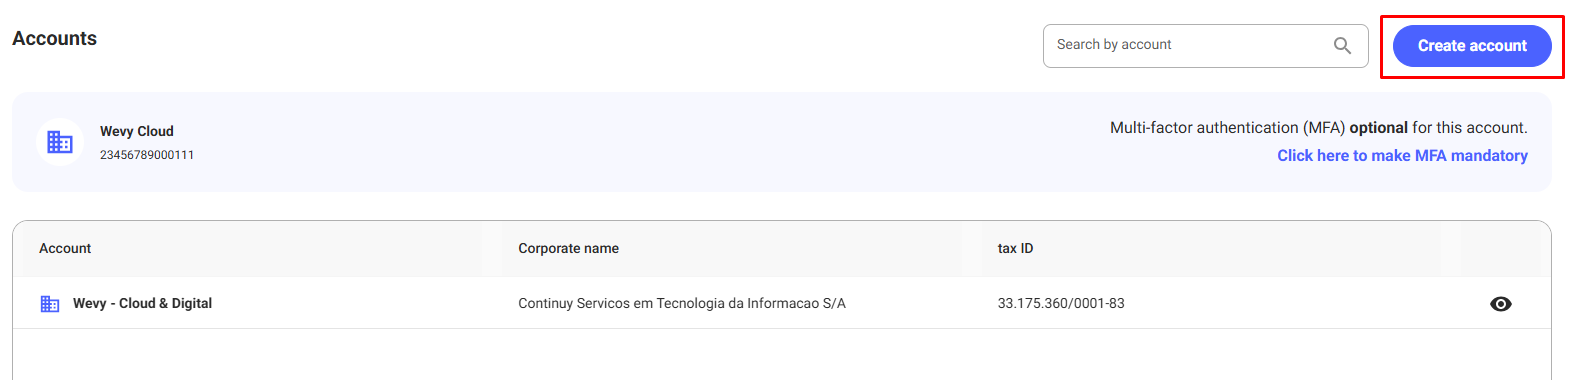
When there are registered accounts, this screen will be displayed.
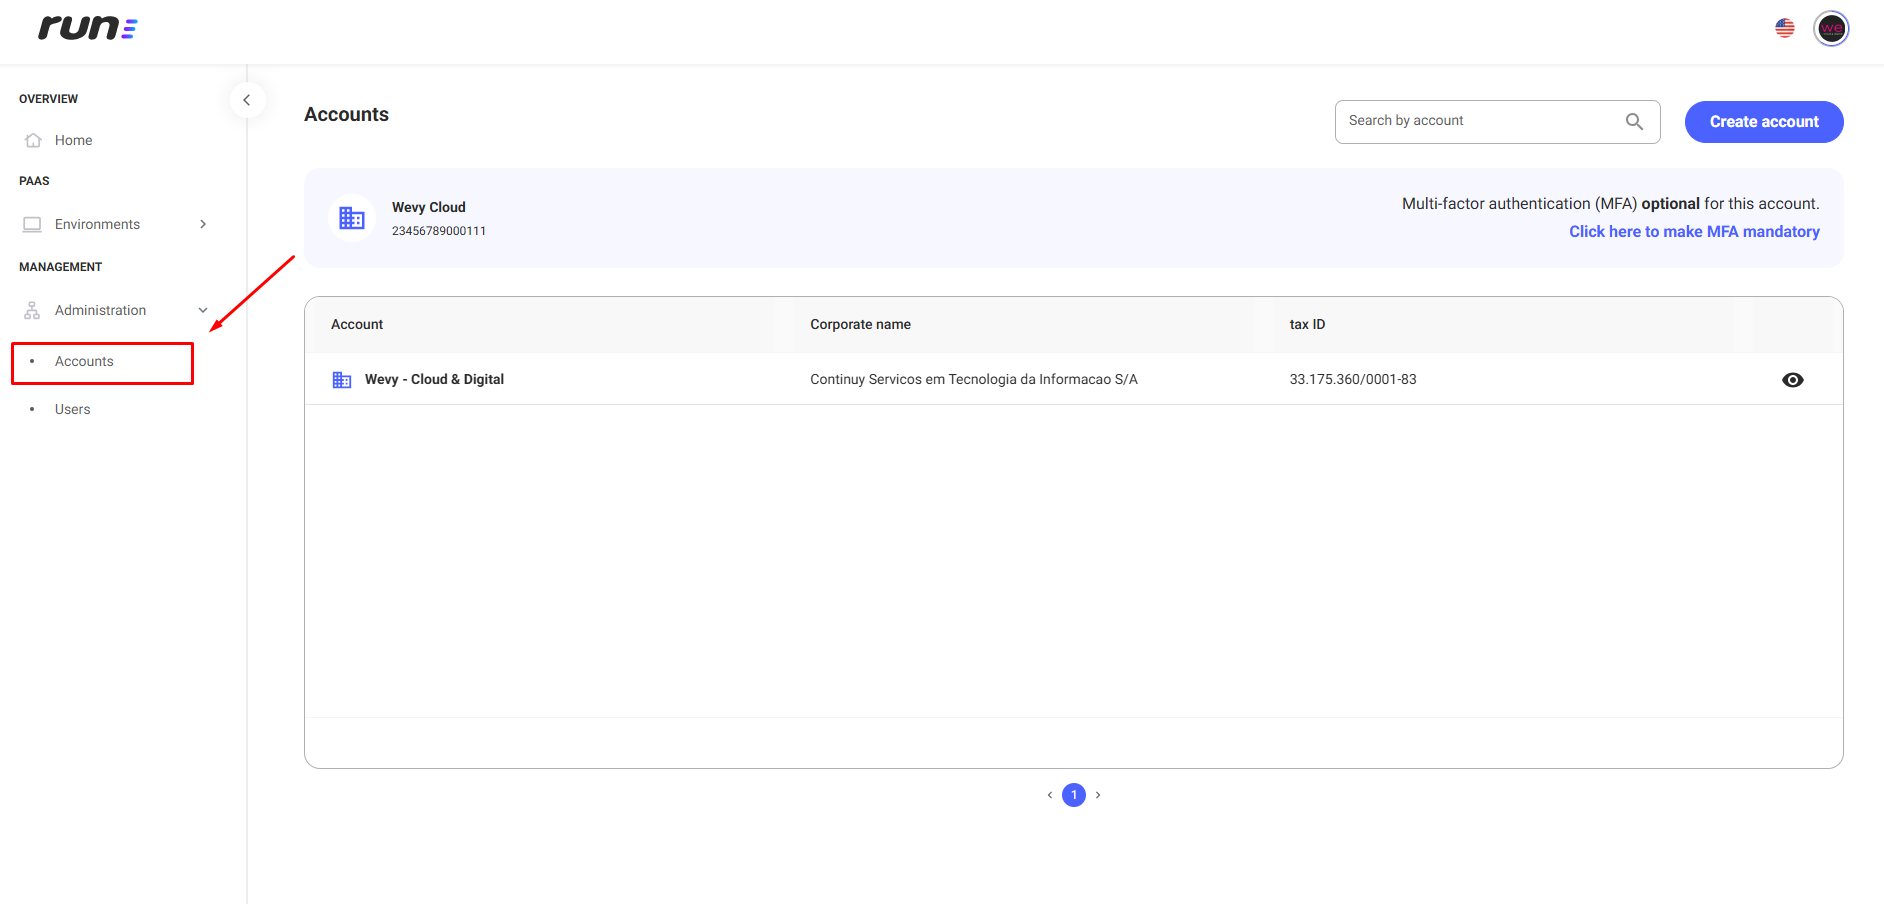
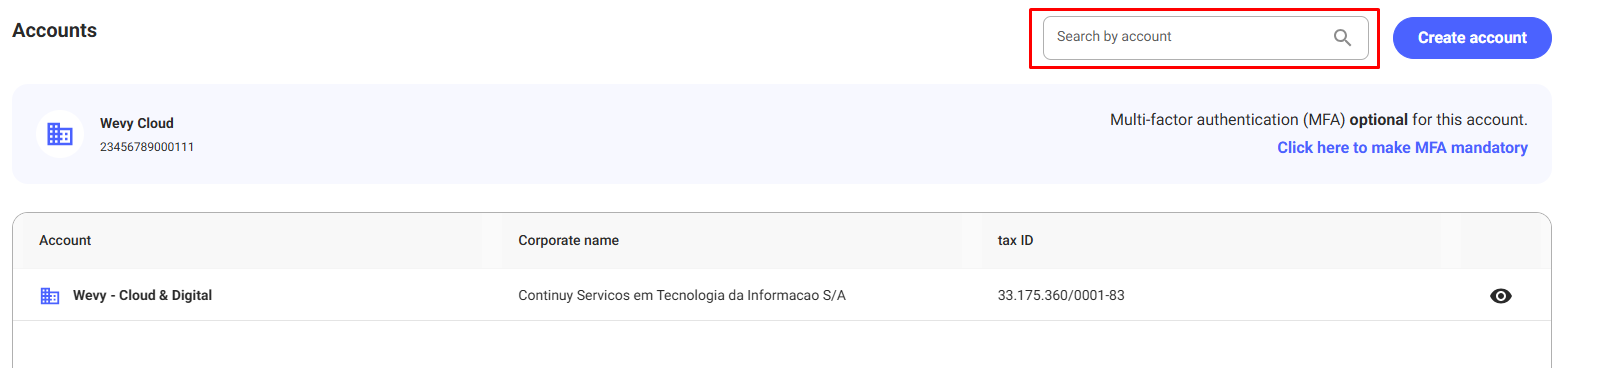
1. Search Bar
- Located in the top right corner, the search bar allows the user to search for accounts by client's trade name or part of the trade name.
- The search field displays the example text "Search for an account", guiding the user on how to perform the search.
2. Linked Company Information and Multifactor Authentication (MFA) Setup
This section displays the information of the company associated with your profile:
- Trade Name: Commercial name of the company.
- tax ID: CNPJ or other business identifier.
2.1. MFA Setup
Multifactor Authentication (MFA) defines the level of security applied to user access to the account:
2.1.1. Mandatory
All users of the account must enable and use MFA to access Run.
- To make it mandatory, click "Click here to make MFA mandatory".

- A confirmation window will then be displayed.
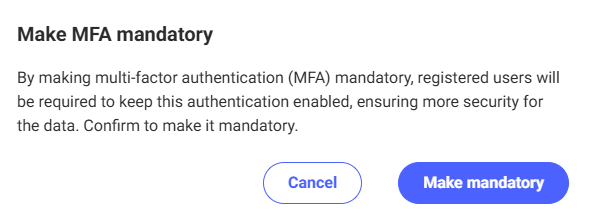
- Actions
- Cancel: Stops the action.
- Make mandatory: Confirms the activation of MFA for all users.
When you activate multifactor authentication (MFA) as mandatory, all accesses to the account will require this additional verification. This enhances data security and protects against unauthorized access.
2.1.2. Optional
When MFA is made optional, registered users can choose to disable or enable this authentication.
- To make MFA optional, click the three dots
 and select the Make MFA optional option.

- A confirmation window will then be displayed.
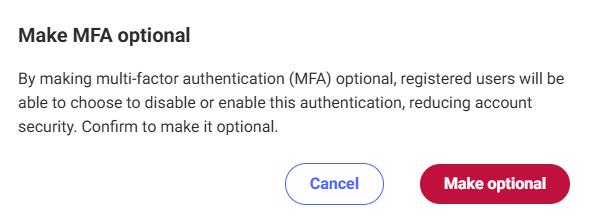
- Actions
- Cancel: Stops the action.
- Make optional: Confirms the change, allowing all users to choose whether or not to enable MFA.
Making MFA optional may reduce account security, leaving it more vulnerable to unauthorized access.
3. Account Table
The table lists all accounts registered in the system.
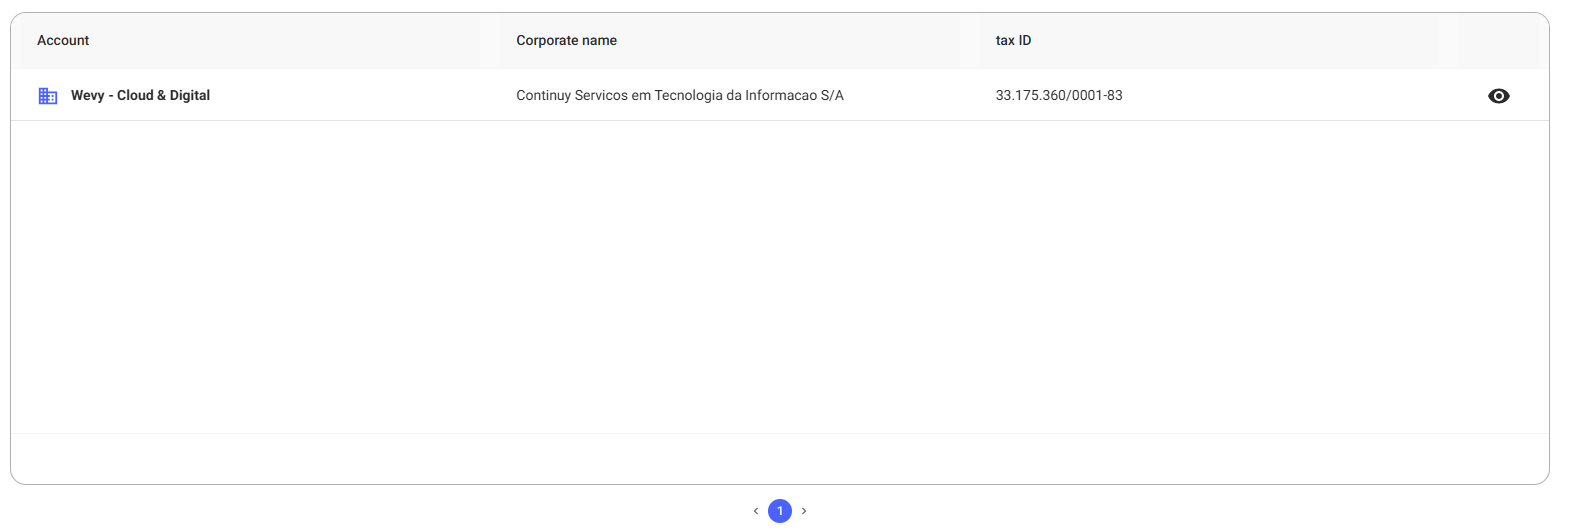
The table contains the following columns:
| Column | Description |
|---|---|
| Account | Client's trade name. |
| Corporate Name | Officially registered name. |
| Registration | CNPJ or other business identifier. |
4. Account Details Screen
- Click on the symbol
 .
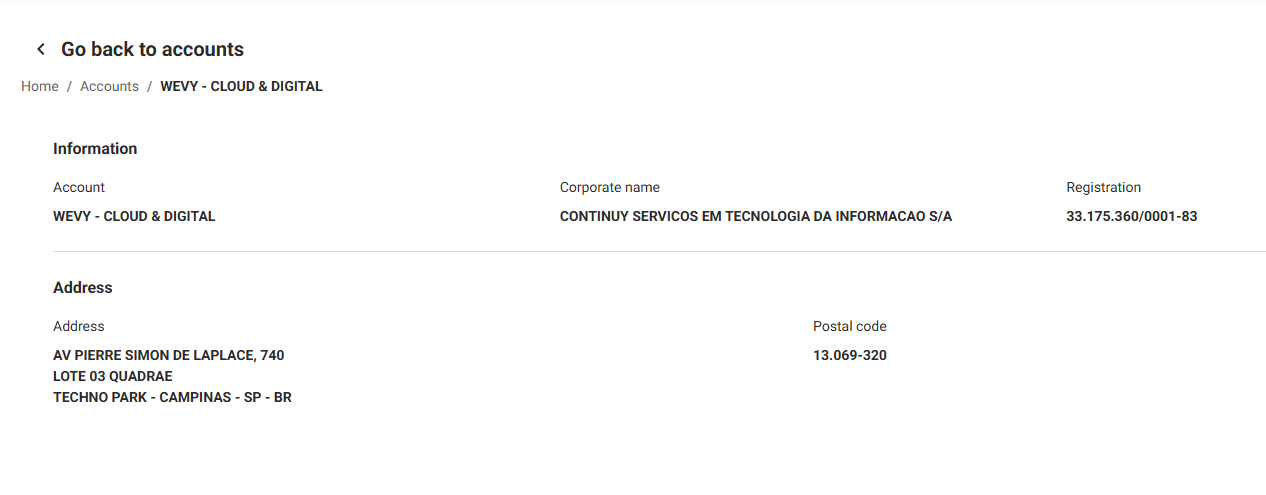
. - The Account Details screen will open, showing complete information about the selected account, allowing you to view registration data, address, and security settings.
4.1. Account Information
Displays essential information about the selected account:
- Account: Trade name of the company.
- Corporate Name: Officially registered name, used in legal documents.
- tax ID: Unique number identifying the company to the Federal Revenue Service.

4.2. Address
Displays the official address associated with the account:
- Street: Name of the street, avenue, or road, followed by the building number.
- Complement: Additional information, such as block, apartment, or sector (if any).
- Neighborhood: Area or subdivision where the property is located.
- City: Municipality where the property is located.
- State (UF): Federal unit corresponding to the address.
- Country: Country of address registration.
- Postal Code (CEP): Postal code facilitating geographic location.

5. Create Account
This feature allows you to add a new account to the system.
Step-by-Step: Create Account
🔵 Step 1. Access the create option
- Access the Create Account button when there are no accounts registered.
- Click the button: Create Account
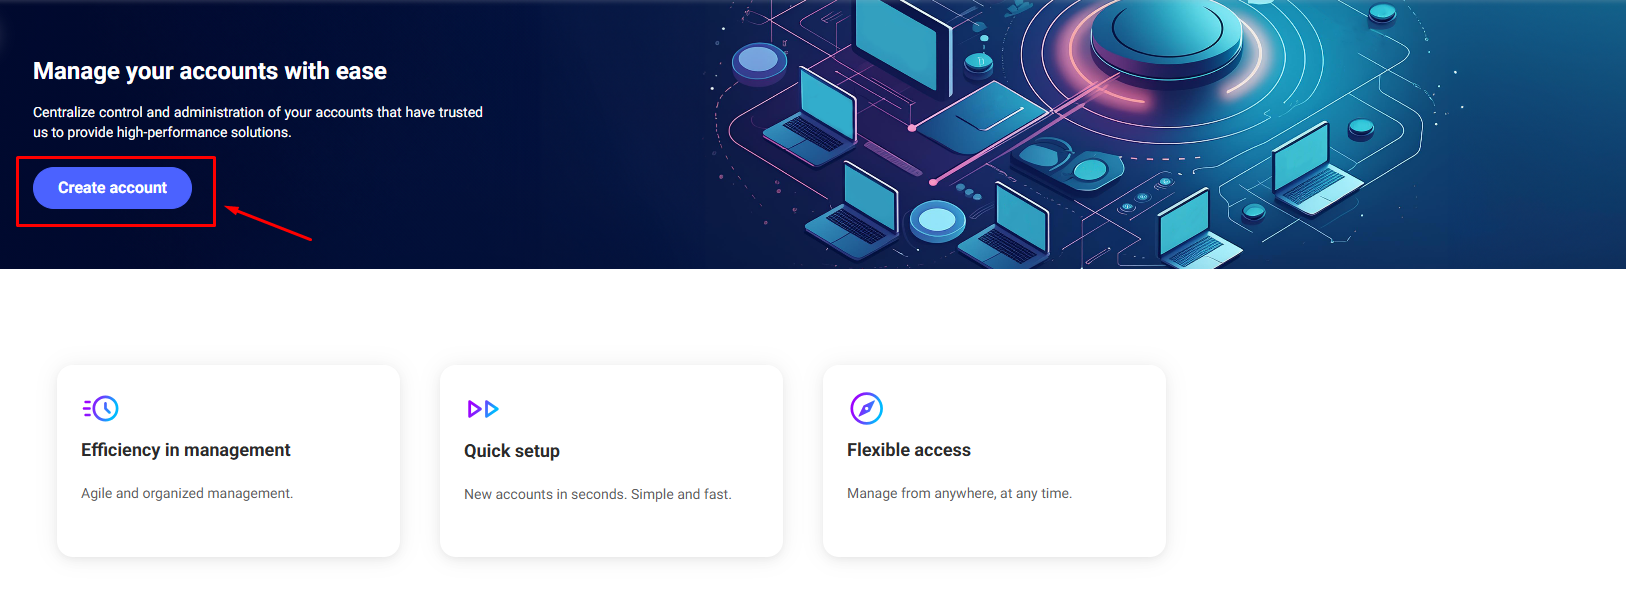
- Access the Create Account button when there are accounts registered.
- Click the button: Create Account
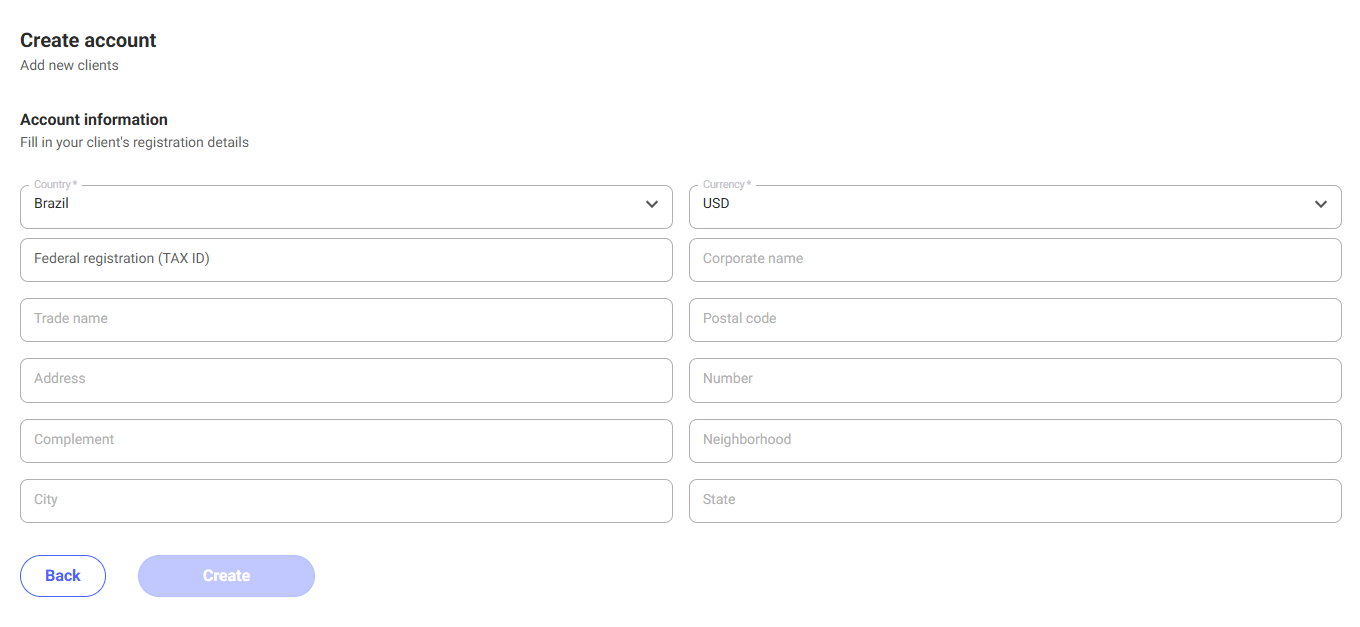
- The account creation screen will then be displayed.
🔵 Step 2. Fill in the details
To create clients in Brazil
- After selecting "Brazil" in the Country field:
- Enter the CNPJ in the Federal Registration (tax ID) field.
- The system will automatically consult the Federal Revenue.
- The remaining fields will be populated with the available registration data.
To create clients from other countries
- After selecting a country other than Brazil in the Country field:
- All fields will be enabled for manual entry.
- Form fields:
- Country: Select the client's country (default: Brazil).
- Currency: Select the currency used by the client.
- Federal Registration (tax ID): Enter the client's CNPJ.
- Trade Name: Enter the client's commercial name or nickname.
- Corporate Name: Enter the officially registered name of the client.
- Street: Enter the address (Street, Avenue, etc.).
- Number: Enter the address number.
- Complement: Additional details, such as "Block A" or "Apt 101".
- Neighborhood: Name of the neighborhood.
- City: Name of the city.
- State: UF (Federal Unit).
- Postal Code (CEP): Client's postal code.
🔵 Step 3. Confirm or cancel the creation
- To cancel and return to the accounts screen, click: Back.
- To register the new account in the system, click: Create.